Hi, I’ml Léo, I like creating a bunch of stuff by smashing my keyboard. This project is part of my journey in 3D graphics. I’ve wanted to implement by myself the Marching Cube algorithm. I cannot state how much this video helped me in debugging my code, I’m also using Deadlock’s triangulation table.
Why do that
I’ve wanted to implement that algorithm due to a few games based on voxels that I always really liked :
And of course, everyone’s favorite cube game, Minecraft.
Current features
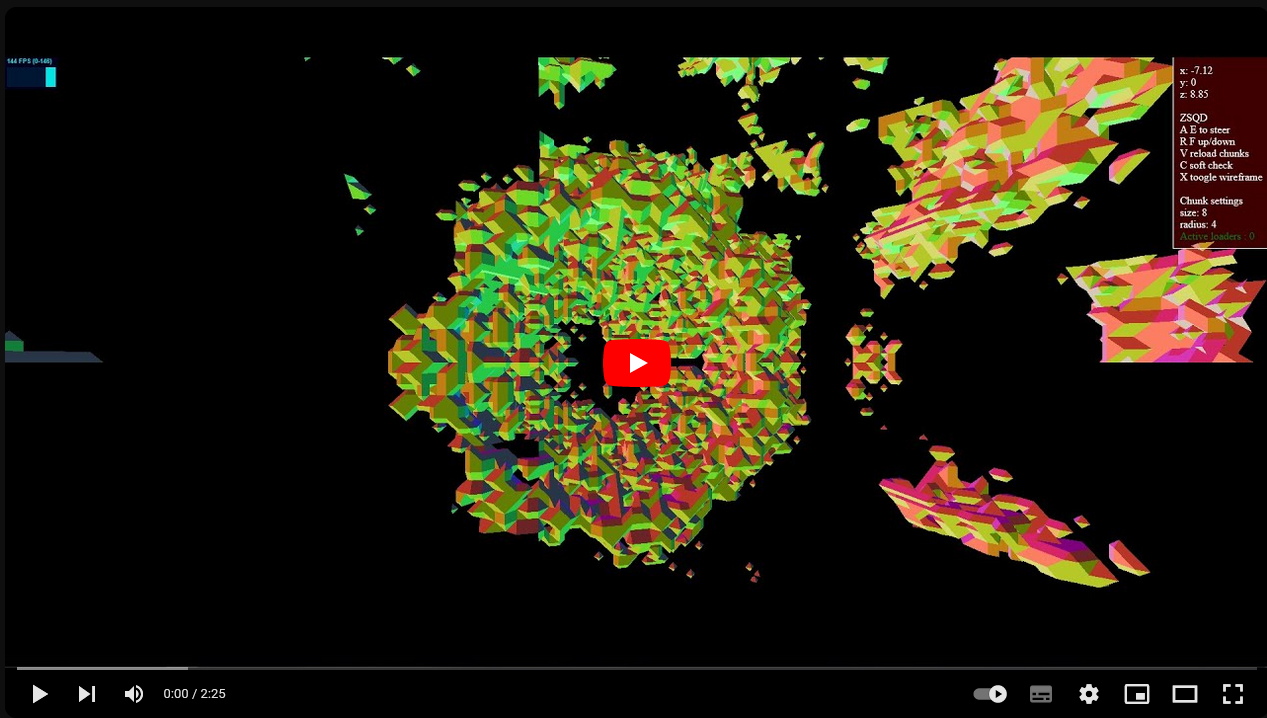
Currently, the demo has a working camera that you can control using the listed keybinds below.
You can toggle the wireframe by pressing X and reset chunks with V. Note that doing so will regenerate all the active chunks.
If your computer allows it, you can enable the auto chunk check to always generate and load chunks in a radius around you. I have implemented Web Workers to generate each chunk. However the generation is done on the CPU. An active web worker counter is displayed in the info panel.
Web workers are terminated if they are currently working on chunks that are no longer used, in order to avoid computations on chunks that won’t be used.
If the auto chunk check is not enabled (disabled by default), you can press C to refresh the active chunk list to chunks around you.
Precautions with chunk radius
Please be careful when upping the chunk radius. It is generally better to increase the size of a chunk instead of teh radius, as each chunk will spawn a worker. A high radius leads to sometimes absurd amounts of workers; I do not recommend going past 5, which already spawns 515 of them.
Issues in Chrome and Opera
I’m aware of very bad performance in Chrome and Opera, however I do not think I have much control on that, though I’ll look into it. No issues spotted running the demo on Firefox with a beefy machine. My setup runs an hexacore i5-10400 and a GTX-1660S and loads it pretty fast.
Screenshots 🖼️
Fully generated Mandelbulb sphere.
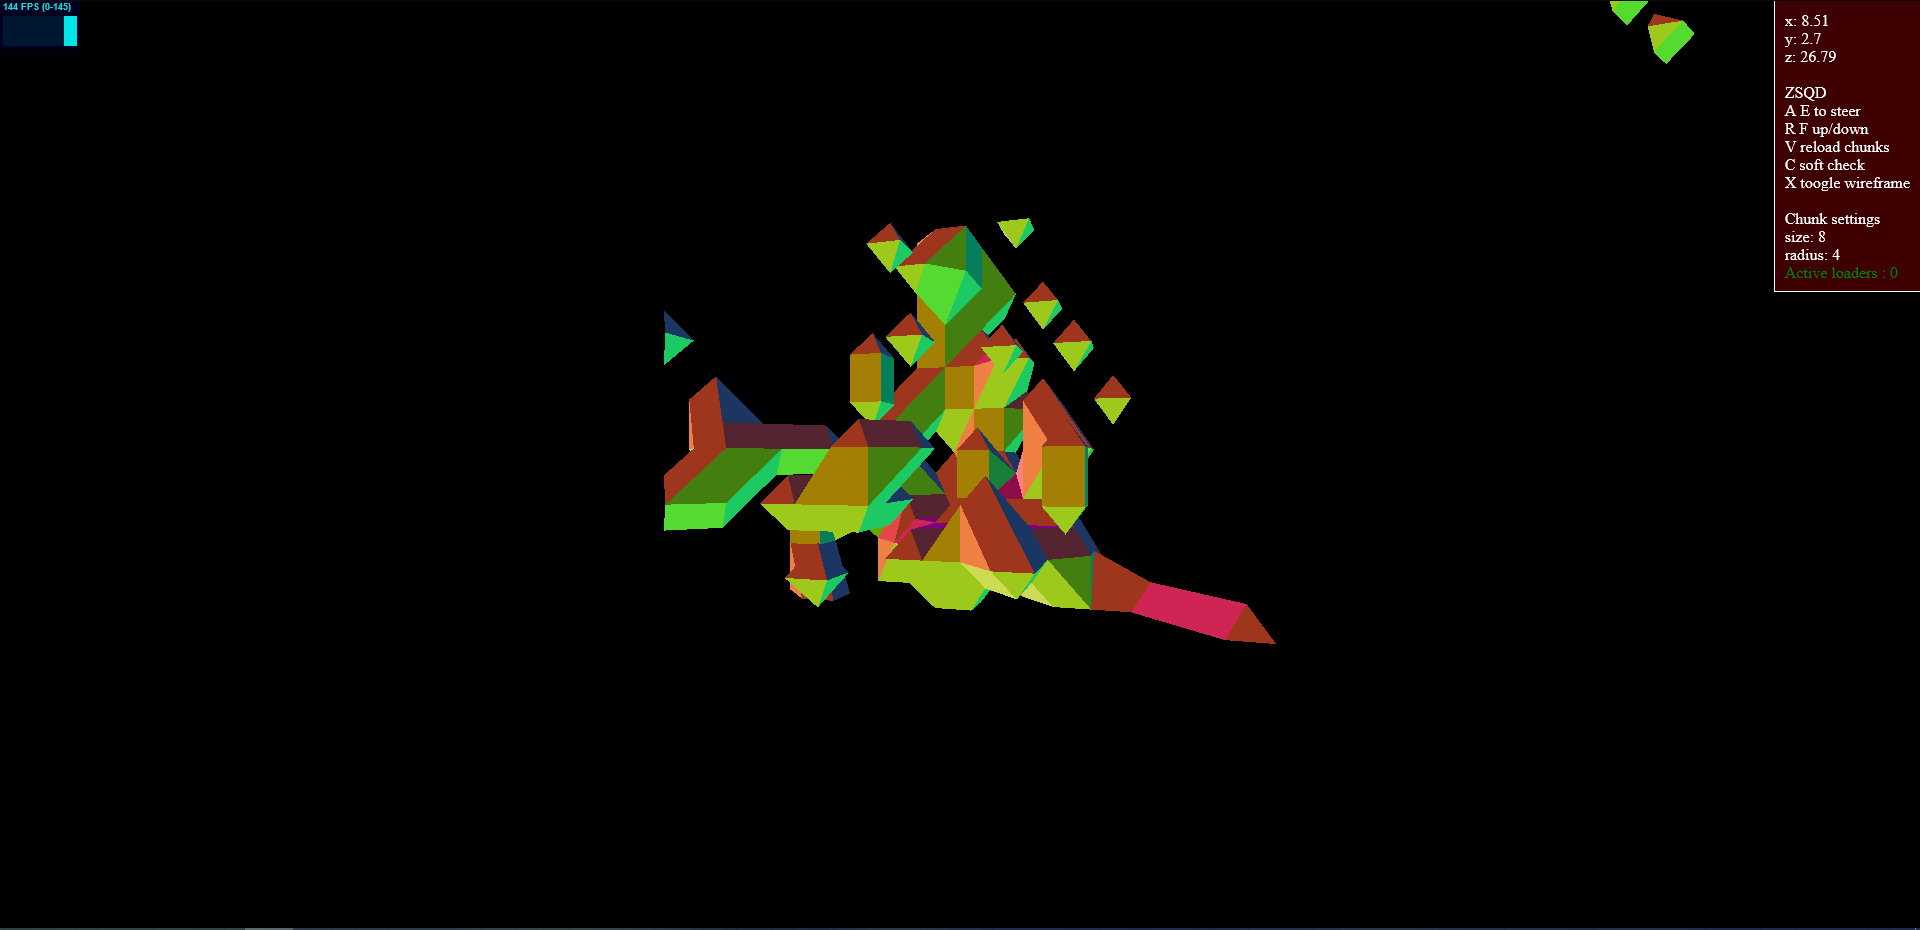
random blob from appearing when surrounding chunks are not generated.
Build the app and the new items will be available to select in the UI.
Abstract
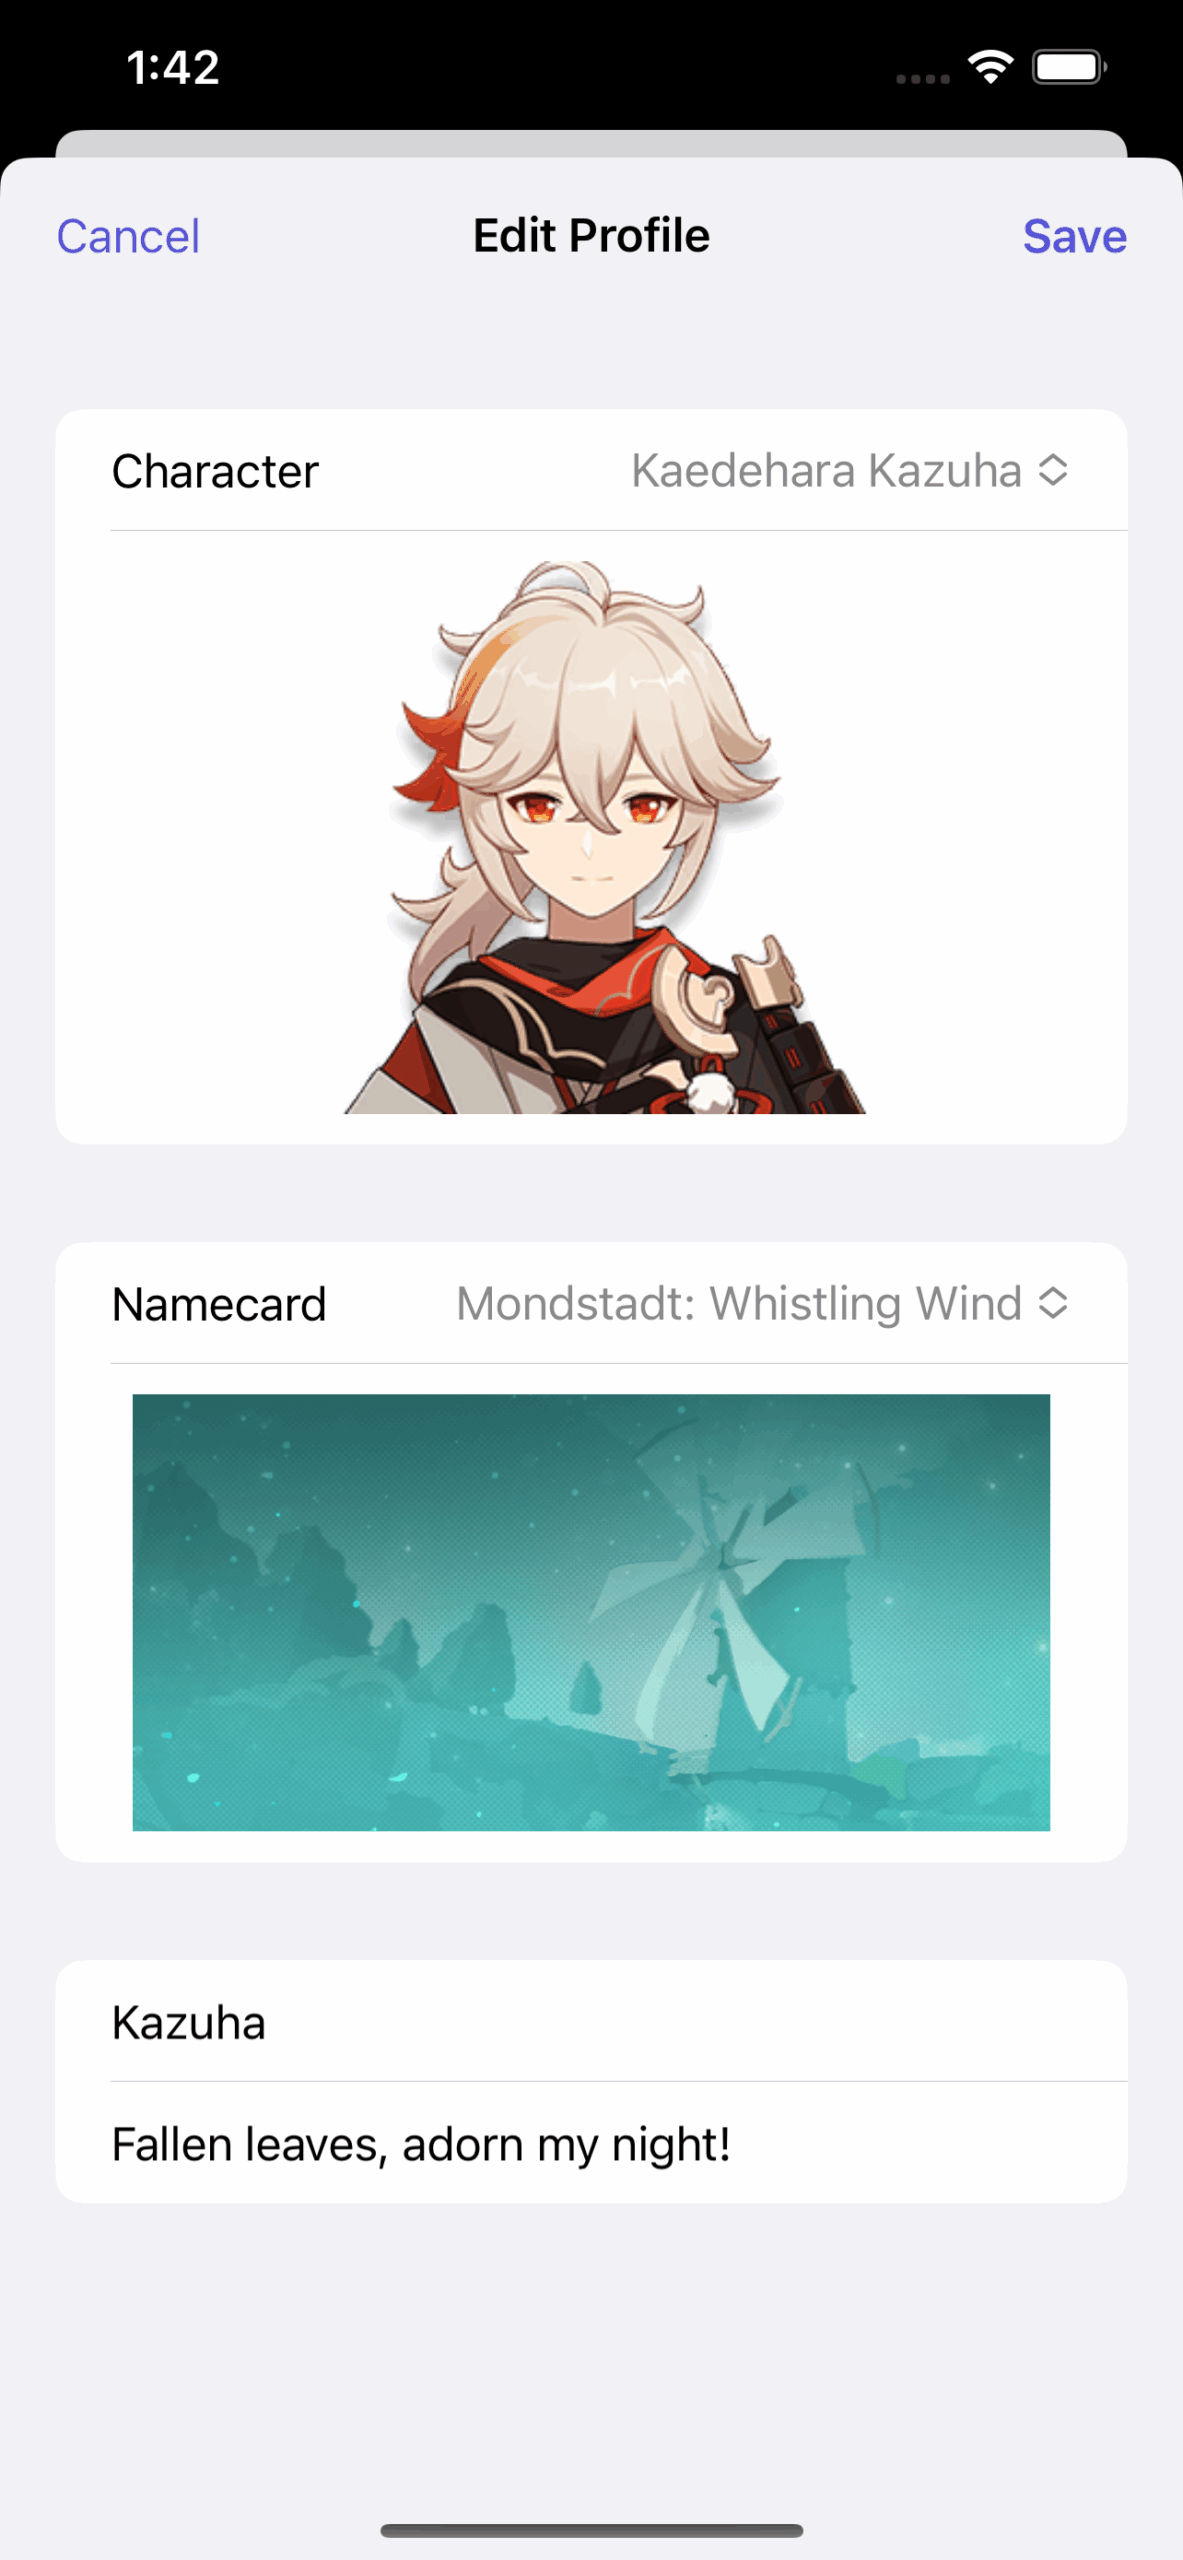
GI Profile lets you create customised widgets with your favourite characters and name cards. The widget can display one of the playable characters’ avatar, custom nickname and optional signature, as well as one of the name card backgrounds from the game itself. You can have as many different widgets as you’d like.
GI Profile is an unofficial app, not endorsed or affiliated by miHoYo, HoYoverse or Cognosphere. Game content, images and text are copyright of miHoYo, HoYoverse, Cognosphere and/or Genshin Impact.
Cash Wise is a budget management tool that allows users to track their spending across different categories. With Cash Wise, users can easily see where their money is going and make informed decisions about their spending. The app provides a list of transactions for each category the user created, making it easy for users to see how much they have spent and on what. Whether you’re looking to save money or just want to keep better track of your finances, Cash Wise is the perfect tool for managing your budget.
I would like to thank microverse in advance. This is the first draft of this project. It works on my machine. If you try it and run into problems, please create an issue; I’ll get back to it as soon as possible.
Este repositório contém soluções para dois desafios de programação.
Desafio 1: Cálculo de Código de Cores para Resistores
Este projeto implementa uma função que calcula a sequência de cores de um resistor com base em seu valor em ohms, incluindo valores em kilo-ohms e mega-ohms. A sequência de cores é retornada de acordo com os padrões das faixas de resistores, que seguem um código internacional de cores. A entrada do valor do resistor pode ser fornecida em diferentes formatos, como “220 ohms”, “4.7k ohms” ou “1M ohms”, e o programa gera a sequência de cores correspondente. Este código foi projetado para ser flexível e permite validação de entrada, garantindo que valores inválidos sejam devidamente tratados.
Desafio 2: Percorrendo uma Matriz em Espiral
Este projeto oferece uma solução para o desafio de percorrer os elementos de uma matriz N x N de forma espiral, começando pelos elementos mais externos e movendo-se para os mais internos no sentido horário. O algoritmo é capaz de lidar com matrizes de diferentes tamanhos e formatos, organizando os valores em um padrão de caracol. Se o usuário fornecer uma matriz vazia, o código tratará essa entrada adequadamente e retornará uma lista vazia. Esse desafio é comumente conhecido como “percurso em espiral” e é uma excelente prática para manipulação de matrizes e lógica de percorrimento em laços.
Tecnologias Utilizadas
Java
Como Executar
Clone o repositório para o seu ambiente local.
Compile e execute o código Java com um ambiente de desenvolvimento apropriado.
Contribuições
Contribuições são bem-vindas! Sinta-se à vontade para abrir um issue ou enviar um pull request com melhorias ou correções.
Create your feature branch (git checkout -b my-new-feature)
Commit your changes (git commit -am ‘Add some feature’)
Push to the branch (git push origin my-new-feature)
Create new Pull Request
📃 License
Copyright (c) 2019 Mohak Gupta

Permission is hereby granted, free of charge, to any person obtaining a copy of this software and associated documentation files (the "Software"), to deal in the Software without restriction, including without limitation the rights to use, copy, modify, merge, publish, distribute, sublicense, and/or sell copies of the Software, and to permit persons to whom the Software is furnished to do so, subject to the following conditions:

The above copyright notice and this permission notice shall be included in all copies or substantial portions of the Software.

THE SOFTWARE IS PROVIDED "AS IS", WITHOUT WARRANTY OF ANY KIND, EXPRESS OR IMPLIED, INCLUDING BUT NOT LIMITED TO THE WARRANTIES OF MERCHANTABILITY, FITNESS FOR A PARTICULAR PURPOSE AND NONINFRINGEMENT. IN NO EVENT SHALL THE AUTHORS OR COPYRIGHT HOLDERS BE LIABLE FOR ANY CLAIM, DAMAGES OR OTHER LIABILITY, WHETHER IN AN ACTION OF CONTRACT, TORT OR OTHERWISE, ARISING FROM, OUT OF OR IN CONNECTION WITH THE SOFTWARE OR THE USE OR OTHER DEALINGS IN THE SOFTWARE.
Getting Started
For help getting started with Flutter, view our online documentation.
For help on editing package code, view the documentation.
Wolframite (formerly Clojuratica) brings together two of today’s most exciting tools for high-performance, parallel computation.
Clojure is a dynamic functional programming language with a compelling approach to concurrency and state, a strong cast of persistent immutable data structures, and a growing reputation for doing all the right things.
Wolfram Mathematica is arguably the world’s most powerful integrated tool for numerical computation, symbolic mathematics, optimization, and visualization and is build on top of its own splendid functional programming language, Wolfram Language.
By linking the two:
Wolframite lets you write and evaluate Wolfram/Mathematica code in Clojure with full syntactic integration. Now Clojure programs can take advantage of Wolfram’s enormous range of numerical and symbolic mathematics algorithms and fast matrix algebra routines.
Wolframite provides the seamless and transparent translation of native data structures between Clojure and Wolfram. This includes high-precision numbers, matricies, N-dimensional arrays, and evaluated and unevaluated Mathematica expressions and formulae.
Wolframite lets you write Wolfram as if it was Clojure by providing Clojure functions and vars for all Wolfram symbols, including docstrings and autocompletion in your favorite IDE
[Tentative] Wolframite facilitates the “Clojurization” of Wolfram’s existing parallel-computing capabilities. Wolfram is not designed for threads or concurrency. It has excellent support for parallel computation, but parallel evaluations are initiated from a single-threaded master kernel which blocks until all parallel evaluations return. By contrast, Wolframite includes a concurrency framework that lets multiple Clojure threads execute Wolfram expressions without blocking others. Now it is easy to run a simulation in Clojure with 1,000 independent threads asynchronously evaluating processor-intensive expressions in Wolfram. The computations will be farmed out adaptively and transparently to however many Wolfram kernels are available on any number of processor cores, either locally or across a cluster, grid, or network.
Notice that you cannot run more Wolfram kernels than your license allows (see the function (wolframite.core/kernel-info!))
Wolframite is open-source and targeted at applications in scientific computing, computational economics, finance, and other fields that rely on the combination of parallelized simulation and high-performance number-crunching. Wolframite gives the programmer access to Clojure’s most cutting-edge features–easy concurrency and multithreading, immutable persistent data structures, and software transactional memory—alongside Wolfram’s easy-to-use algorithms for numerics, symbolic mathematics, optimization, statistics, visualization, and image-processing.
Wolfram / Mathematica itself is a commercial product and requires a license. Though Wolfram Engine is free to use in development.
Documentation
No matter what is your level of experience with either Clojure or Wolfram, we have you covered!
While this page provides a brief overview of Wolframite assuming some level of knowledge of each of the systems, we have also tutorials targeted at scientists new to Clojure
and at Clojure developers new to Wolfram. However, you should try to read through this page, the Quickstart, and browse through Understanding Wolframite before diving into the tutorials. If you have never seen Clojure before, you may want to start with a quick look at our Clojure Primer to understand better the rest of the documentation. Remember: you don’t need to learn or remember all at once.
Usage
Prerequisites:
Clojure
First, if you haven’t already, install the Clojure CLI toolchain (homebrew is a great way to do this if you’re on Mac or Linux, but you can just as easily use the installation scripts if you prefer).
Wolfram Mathematica or Wolfram Engine
Next, obviously, you’ll need to ensure that you have Wolfram Engine or the Wolfram desktop application (formerly called Mathematica) installed and your license registered. Make sure you can run these tools on their own before trying Wolframite.
First of all, you need to initialize a connection to a Wolfram/Mathematica kernel, like this:
(wolframite.api.v1/start!)
This should also find and load the JLink JAR included with your installation. Watch stdout for an INFO log message (via clojure.tools.logging) like:
=== Adding path to classpath: /Applications/Wolfram Engine.app/Contents/Resources/Wolfram Player.app/Contents/SystemFiles/Links/JLink/JLink.jar ===
However, sometimes Wolframite may fail to find the correct path automatically and needs your help. You can set the WOLFRAM_INSTALL_PATH environment variable,
(require '[wolframite.api.v1 :as wl]
'[wolframite.wolfram :as w :refer:all; Wolfram symbols as Clojure vars / fns:exclude [* + - -> / < <= = == > >= fn
Byte Character Integer Number Short String Thread]])
;; Initialize
(wl/start!) ; => {:status :ok, :wolfram-version 14.1, :started? true};; Use it:
(wl/! (Dot [224] [456]))
;=> 42
More examples:
(wl/! (D (Power 'x 2) 'x)) ; derivative;=> (* 2 x)
(wl/! (ChemicalData"Ethanol""MolarMass"))
;=> (Quantity 46.069M (* "Grams" (Power "Moles" -1)));; Accessing WolframAlpha (BEWARE: must be online)
(wl/! (WolframAlpha"How many licks does it take to get to the center of a Tootsie Pop?"))
;=> [(-> [["Input" 1] "Plaintext"] "How many licks does it take to get to the Tootsie Roll; center of a Tootsie Pop?") (-> [["Result" 1] "Plaintext"] "3481\n(according to student; researchers at the University of Cambridge)")]
(wl/! (N Pi 20)) ; numerical value with 20 digit precision;=> 3.141592653589793238462643383279502884197169399375105820285M
(wl/! (Map (w/fn [x] (Sqrt x)) [416]))
;=> [2 4]
TIP: Cursive – teach it to resolve w/fn as clojure.core/fn.
NOTE: The wolframite.wolfram (w) namespace has vars for all Wolfram symbols at the time of the last release of Wolframite. Check w/*wolfram-kernel-name* for kernel type/version and run (wolframite.impl.wolfram-syms.write-ns/write-ns!)
to generate your own wolfram ns with whatever additional symbols your Wolfram/Mathematice has, and/or with custom “aliases”.
Clerk Integration
We primarily use Clay as our notebook tool, but there is also experimental support for Clerk.
Open dev/notebook/quickstart.clj, make a change and save.
Open localhost:7777 in the browser
How does it work?
You compose Wolfram expressions using the convenience functions and vars from wolframite.wolfram. These are then turned first into a symbolic representation of themselves and later into a tree of JLink Expr objects and sent to a Wolfram kernel subprocess (started by wl/start!) for evaluation. The result is translated back from jlink.Expr into a Clojure form. This translation allows for some additional convenience logic, such as supporting w/* instead of Times.
Development
Running tests
To run tests from the command line, you need to add JLink to the classpath (only REPL supports dynamically loading jars) –
create a ./symlink-jlink.jar symlink and then run the tests:
clojure -X:run-tests
Deployment and release
The release process is:
Clear (rm -rf ./target)
Run tests (see above, clojure -X:run-tests).
Update version (see below) and make sure CHANGELOG.md is updated as well
Build and deploy to Clojars – see below
Make and push a tag with the version (e.g. git tag v1.3.0 && git push --tags)
Rebuild, commit, and push the site (clojure -T:build site + commit, push)
If required, update version in deps.edn under :aliases - :neil - :project - :version (possibly using neil).
then build the jar with clojure -T:build jar then deploy with
env CLOJARS_USERNAME=<tbd> CLOJARS_PASSWORD=<clojars-token> clojure -T:build deploy.
Note: You need to log in to Clojars and generate a deployment token. You also need to be added to
the SciCloj group there by an admin.
Documentation is written as literal programming sources in the notebooks directory and turned into HTML
under docs using Clay
and Quarto.
To render a single namespace/page, require Clay and run (clay/make! {:source-path "<path to the file>""}). Tip: You can also do this without quarto – just add :run-quarto false to the options.
To build the whole site, run clojure -T:build site (remembering to ensure that you have the ./symlink-jlink.jar symlink).
Authors
The original Clojuratica, Wolframite’s predecessor, was created by Garth Sheldon-Coulson, a graduate student at the Massachusetts Institute of Technology and Harvard Law School.
Ongoing maintenance and development over the years have been thanks to
and is now being maintained as part of the SciCloj project. Wolframite is free, open-source software, but if you would like to support our work then please cite us.
@software{Holý_2024},
author = {Holý, Jakub and Clark, Thomas and Ceranka, Pawel and Richards, Norman and Farmer, Dan and Chan, Steve and Sheldon-Coulon, Garth},
license = {Mozilla Public License},
title = {{Wolframite: }},
url = {https://github.com/scicloj/wolframite},
version = {1.0.0-SNAPSHOT},
year = {2024}
Sponsorship
We are grateful for the financial support of Clojurists Together, who supported this work for a quarter in 2024.
Contact
If you would like to contact the maintainers or otherwise seek help from the community then please drop a message into our zulip channel, the #wolframite channel in Clojurians Slack, or contact the team at SciCloj.
License
Distributed under the Mozilla Public License either version 2.0 or (at
your option) any later version.
Legal
The product names used in this website are for identification purposes only.
All trademarks and registered trademarks, including “Wolfram Mathematica,” are the property of their respective owners.
Wolframite is not a product of Wolfram Research.
The software on this site is provided “as-is,” without any express or implied warranty.
If you encounter abusive behavior violating the Ansible Code of Conduct, please refer to the policy violations section of the Code of Conduct for information on how to raise a complaint.
Communication
Join the Ansible forum:
Get Help: get help or help others. Please add appropriate tags if you start new discussions, for example the rabbitmq tag.
You can include it in a requirements.yml file and install it via ansible-galaxy collection install -r requirements.yml, using the format:
---
collections:
  - name: community.rabbitmq
You can also download the tarball from Ansible Galaxy and install the collection manually wherever you need.
Note that if you install the collection from Ansible Galaxy with the command-line tool or tarball, it will not be upgraded automatically when you upgrade the Ansible package. To upgrade the collection to the latest available version, run the following command:
You can also install a specific version of the collection, for example, if you need to downgrade when something is broken in the latest version (please report an issue in this repository). Use the following syntax:
The content of this collection is made by people just like you, a community of individuals collaborating on making the world better through developing automation software.
The aspiration is to follow the following general guidelines:
Changes should include tests and documentation where appropriate.
Changes will be lint tested using standard python lint tests.
No changes which do not pass CI testing will be approved/merged.
The collection plugins must provide the same coverage of python support as
the versions of Ansible supported.
The versions of Ansible supported by the collection must be the same as
those in developed, or those maintained, as shown in the Ansible Release and Maintenance documentation.
Local testing is done with the ansible-test tool which requires a specific
directory hierarchy to function correctly so please follow carefully.
# These base directory environment variables can be adjusted to suit personal preferences
SRC_BASE_DIR="~/code"
VENV_BASE_DIR="~/.venvs"# These should not be altered
COLL_DIR="${SRC_BASE_DIR}/ansible/ansible_collections/community/rabbitmq"
VENV_DIR="${VENV_BASE_DIR}/ansible"# Create the required directory structure
mkdir -p $(basename ${COLL_DIR})# Clone the collection repository
git clone https://github.com/ansible-collections/community.rabbitmq.git ${COLL_DIR}# Create and activate a virtual environment.
virtualenv ${VENV_DIR}source${VENV_DIR}/bin/activate
# Install the devel branch of ansible-base
pip install https://github.com/ansible/ansible/archive/devel.tar.gz --disable-pip-version-check
# Switch into the collection directorycd${COLL_DIR}# Run the integration tests
ansible-test integration --docker default -v --color --python 3.6
# Run the unit tests
ansible-test units --docker default -v --color --python 3.6
Collection maintenance
The current maintainers (contributors with write or higher access) are listed in the MAINTAINERS file. If you have questions or need help, feel free to mention them in the proposals.
To learn how to maintain / become a maintainer of this collection, refer to the Maintainer guidelines.
It is necessary for maintainers of this collection to be subscribed to:
The collection itself (the Watch button -> All Activity in the upper right corner of the repository’s homepage).
The “Changes Impacting Collection Contributors and Maintainers” issue.

 https://github.com/shayanheidari01/rubika