FB-BEV and FB-OCC are a family of vision-centric 3D object detection and occupancy prediction methods based on forward-backward view transformation.
News
[2023/8/01] FB-BEV was accepted to ICCV 2023.
🏆 [2023/6/16] FB-OCC wins both Outstanding Champion and Innovation Award in Autonomous Driving Challenge in conjunction with CVPR 2023 End-to-End Autonomous Driving Workshop and Vision-Centric Autonomous Driving Workshop.
This work is made available under the Nvidia Source Code License-NC. Click here to view a copy of this license.
The pre-trained models are shared under CC-BY-NC-SA-4.0. If you remix, transform, or build upon the material, you must distribute your contributions under the same license as the original.
If this work is helpful for your research, please consider citing:
@inproceedings{li2023fbbev,
  title={{FB-BEV}: {BEV} Representation from Forward-Backward View Transformations},
  author={Li, Zhiqi and Yu, Zhiding and Wang, Wenhai and Anandkumar, Anima and Lu, Tong and Alvarez, Jose M},
  booktitle={IEEE/CVF International Conference on Computer Vision (ICCV)},
  year={2023}
}
@article{li2023fbocc,
  title={{FB-OCC}: {3D} Occupancy Prediction based on Forward-Backward View Transformation},
  author={Li, Zhiqi and Yu, Zhiding and Austin, David and Fang, Mingsheng and Lan, Shiyi and Kautz, Jan and Alvarez, Jose M},
  journal={arXiv:2307.01492},
  year={2023}
}
Acknowledgement
Many thanks to these excellent open source projects:
This project is a web application built with Dash and NetworkX that allows users to visualize random graphs using various graph generation algorithms. Users can interactively select the graph type, layout algorithm, number of nodes, and number of edges to generate and visualize the graph.
Project Description
I created Graphy primarily out of curiosity about graph theory and its practical applications. The project aims to visualize various types of graphs using NetworkX, Dash, and Plotly. It’s a simple yet effective tool for generating and exploring graphs like Erdős-Rényi, Barabási-Albert, and Watts-Strogatz networks.
Admittedly, the implementation is basic; it’s a pretty lazy project with ample room for improvement. Nonetheless, Graphy serves as a practical exercise in applying graph theory concepts in a visual context. Future iterations may focus on enhancing the user interface, adding more graph types, and exploring advanced graph algorithms.
Features
Graph Types Supported:
Erdős-Rényi
Barabási-Albert
Watts-Strogatz
Random Geometric
Connected Caveman
Layout Algorithms:
Spring Layout
Circular Layout
Random Layout
Kamada-Kawai Layout
Fruchterman-Reingold Layout
Interactive Controls:
Dropdowns for selecting graph type and layout algorithm
Input fields for specifying the number of nodes and edges
Graph Visualization:
Nodes colored based on degree centrality
Edge visualization with hover information
Installation
Clone the repository:
git clone https://github.com/RuntimeConnoisseurs/GRAPHY.git
Navigate into the project directory:
Install the required Python packages:
pip install -r requirements.txt
or run pip install networkx dash dash-core-components dash-html-components plotly
Running the Application
Start the application by navigating into the project directory and running this command python app.py
Open a web browser and go to http://localhost:8050 to view the application.
Images
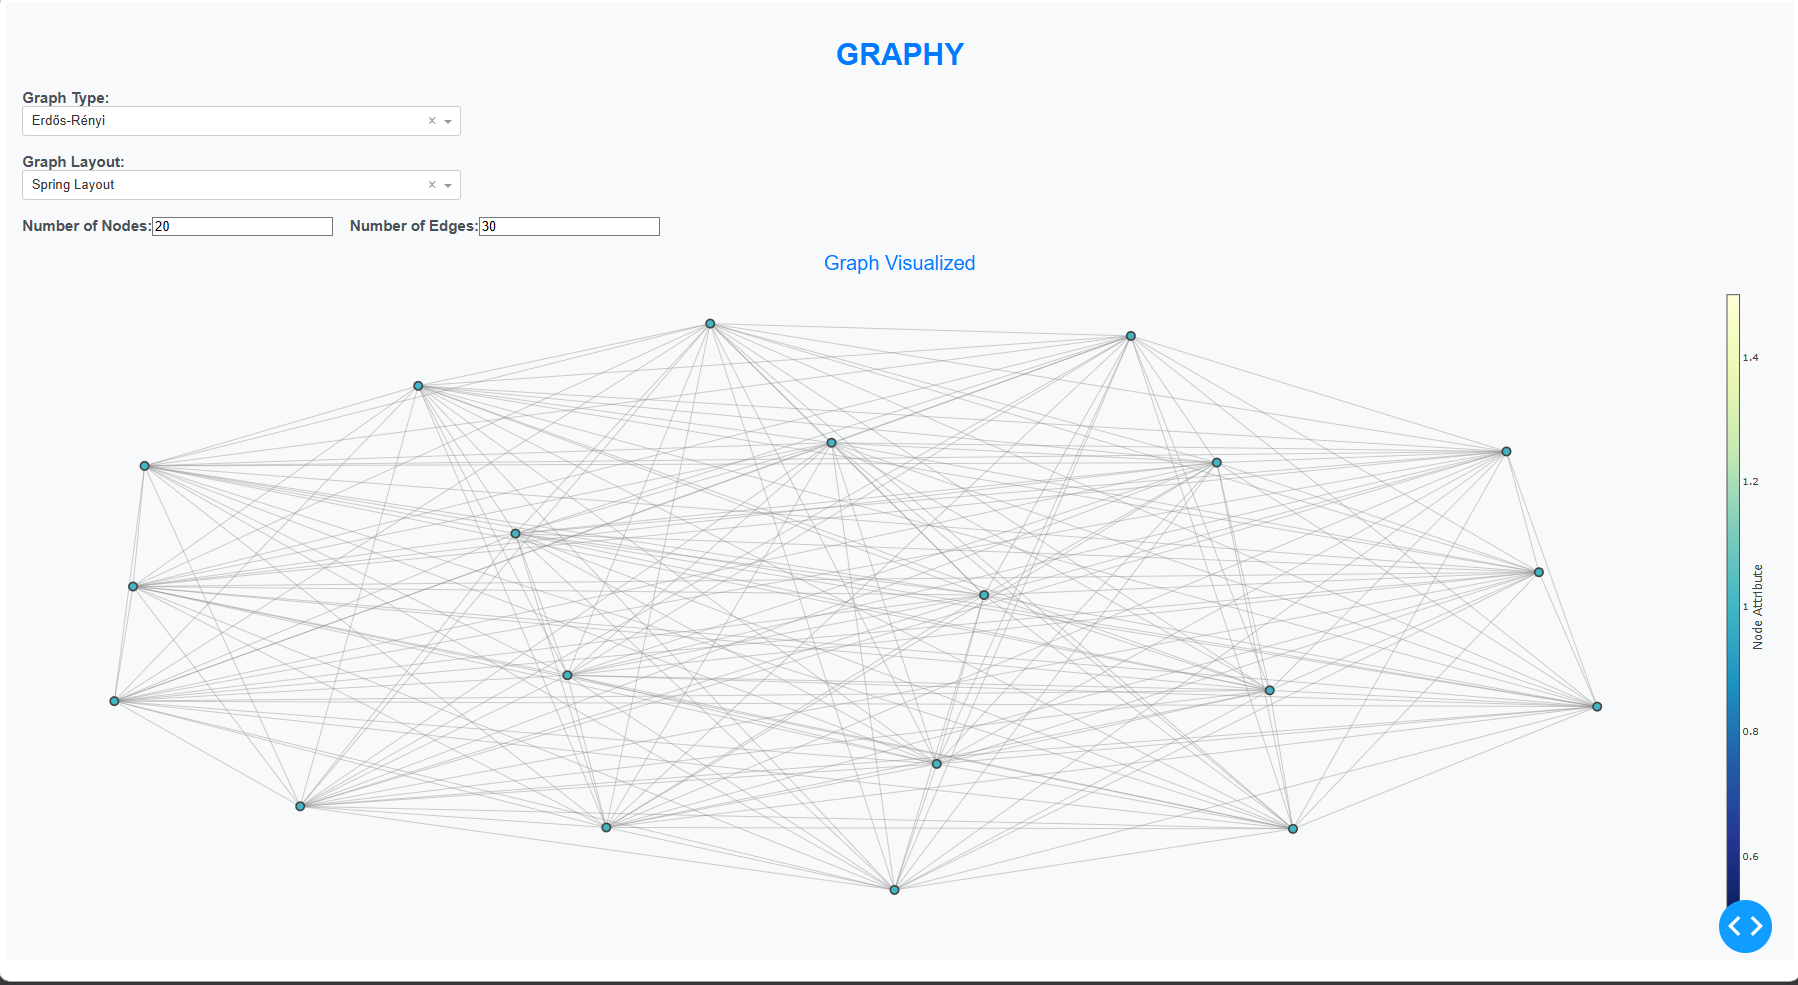
Default view once the webpage is launched:
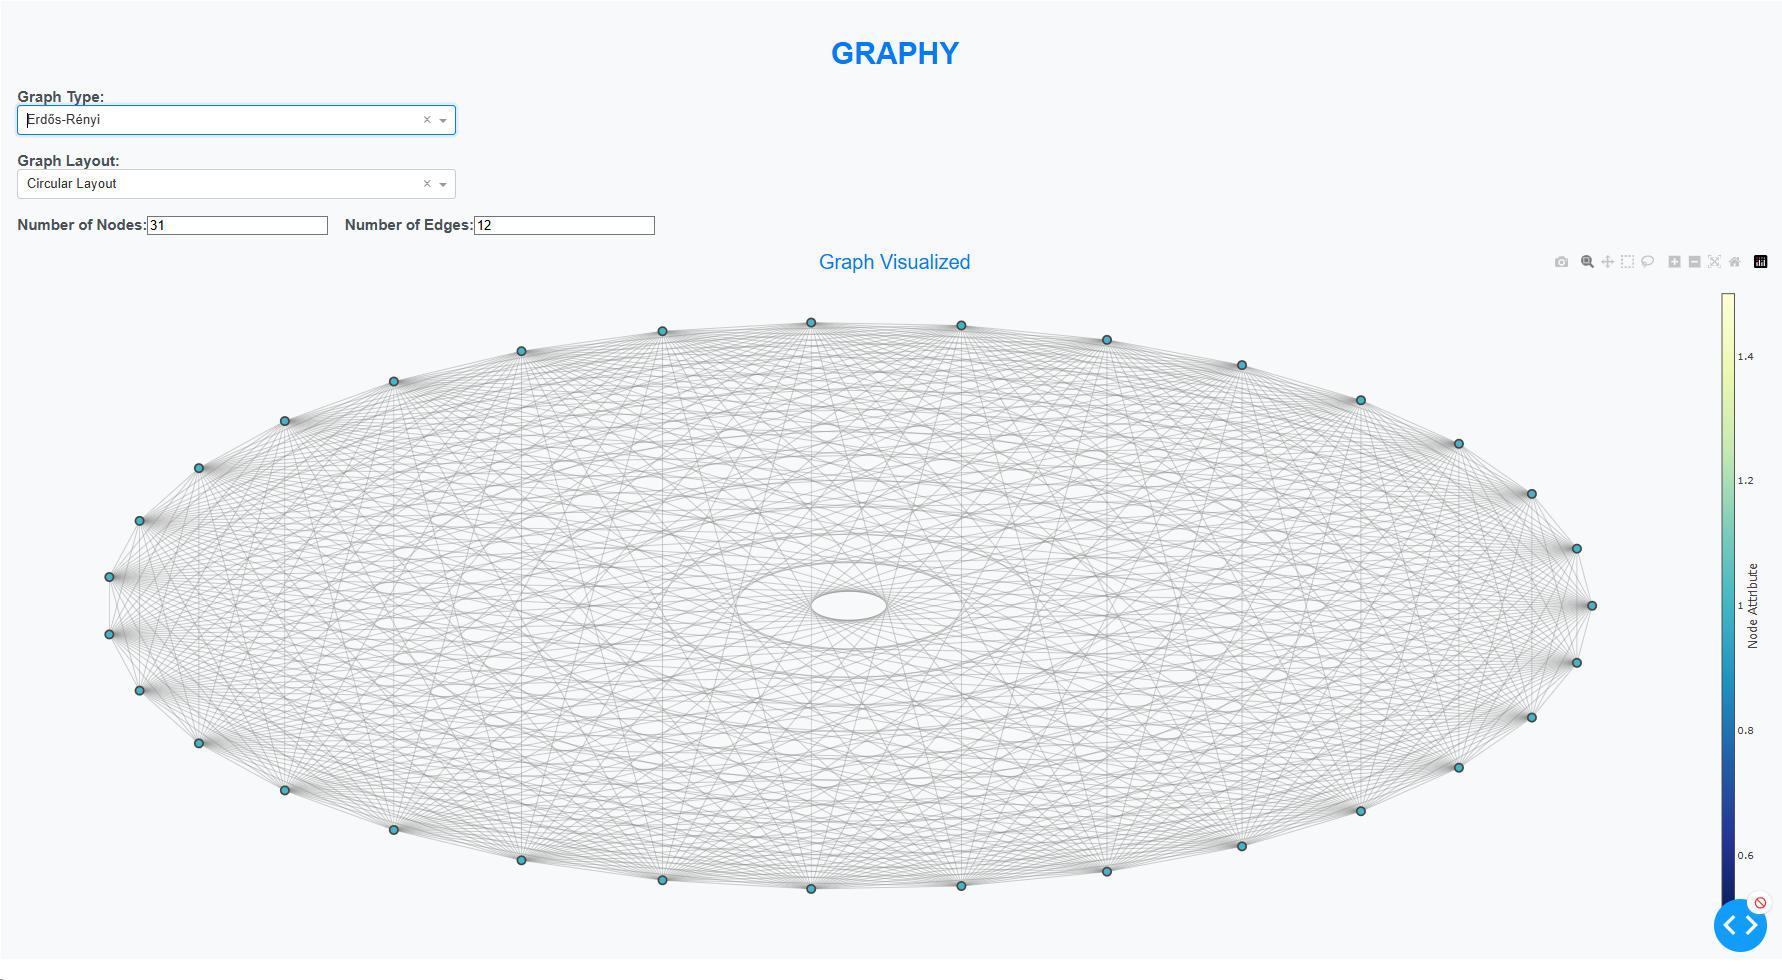
Another View with Circular Layout:
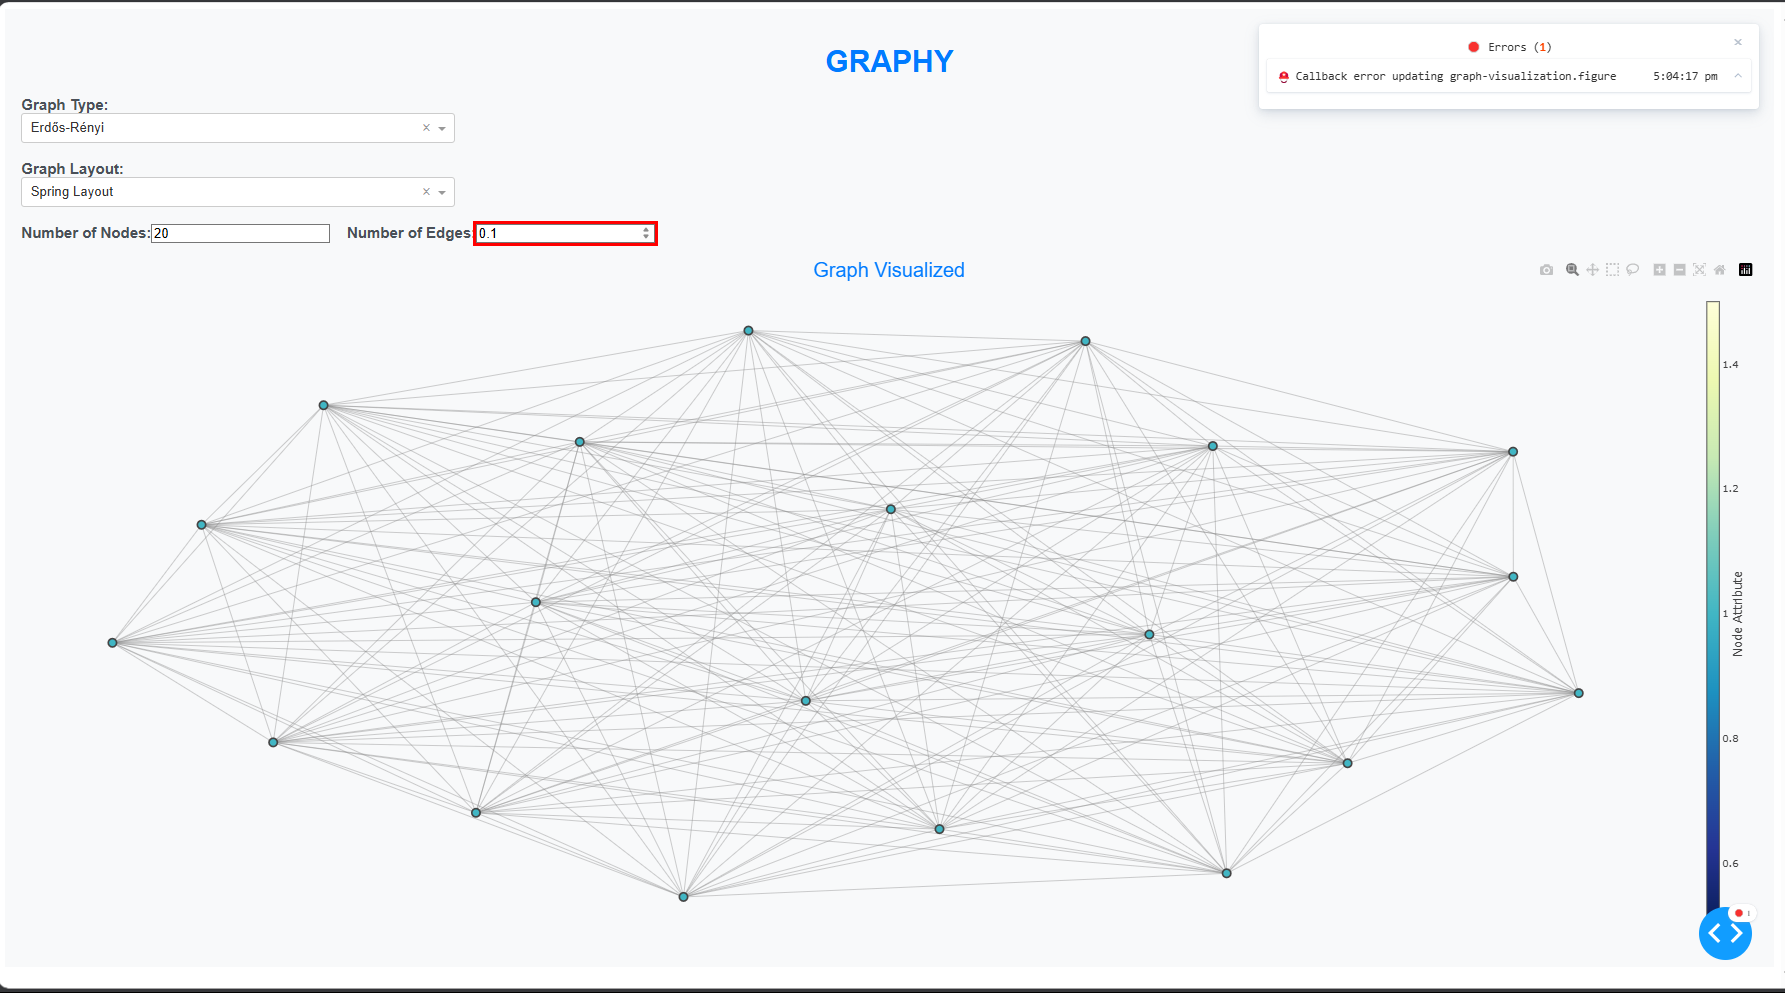
When an error occur it is highhlighted and a pop-up is produced:
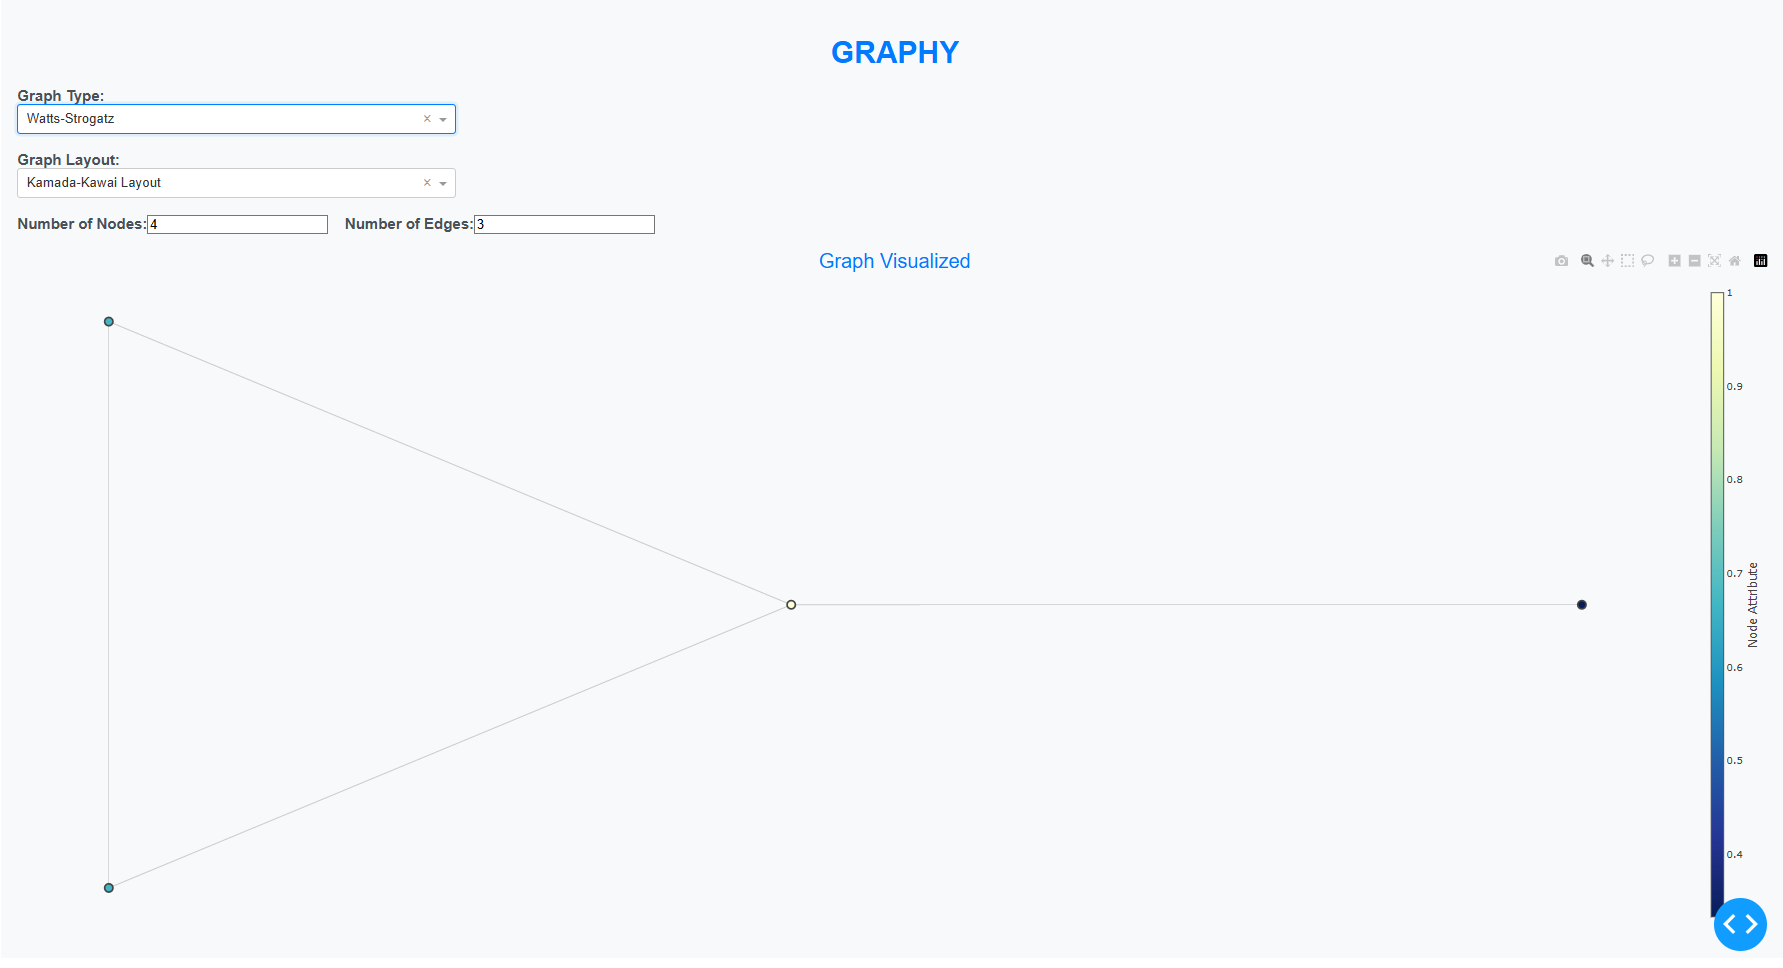
Another Look with Watts-Strogatz Graph and Kamada Kawai Layout:
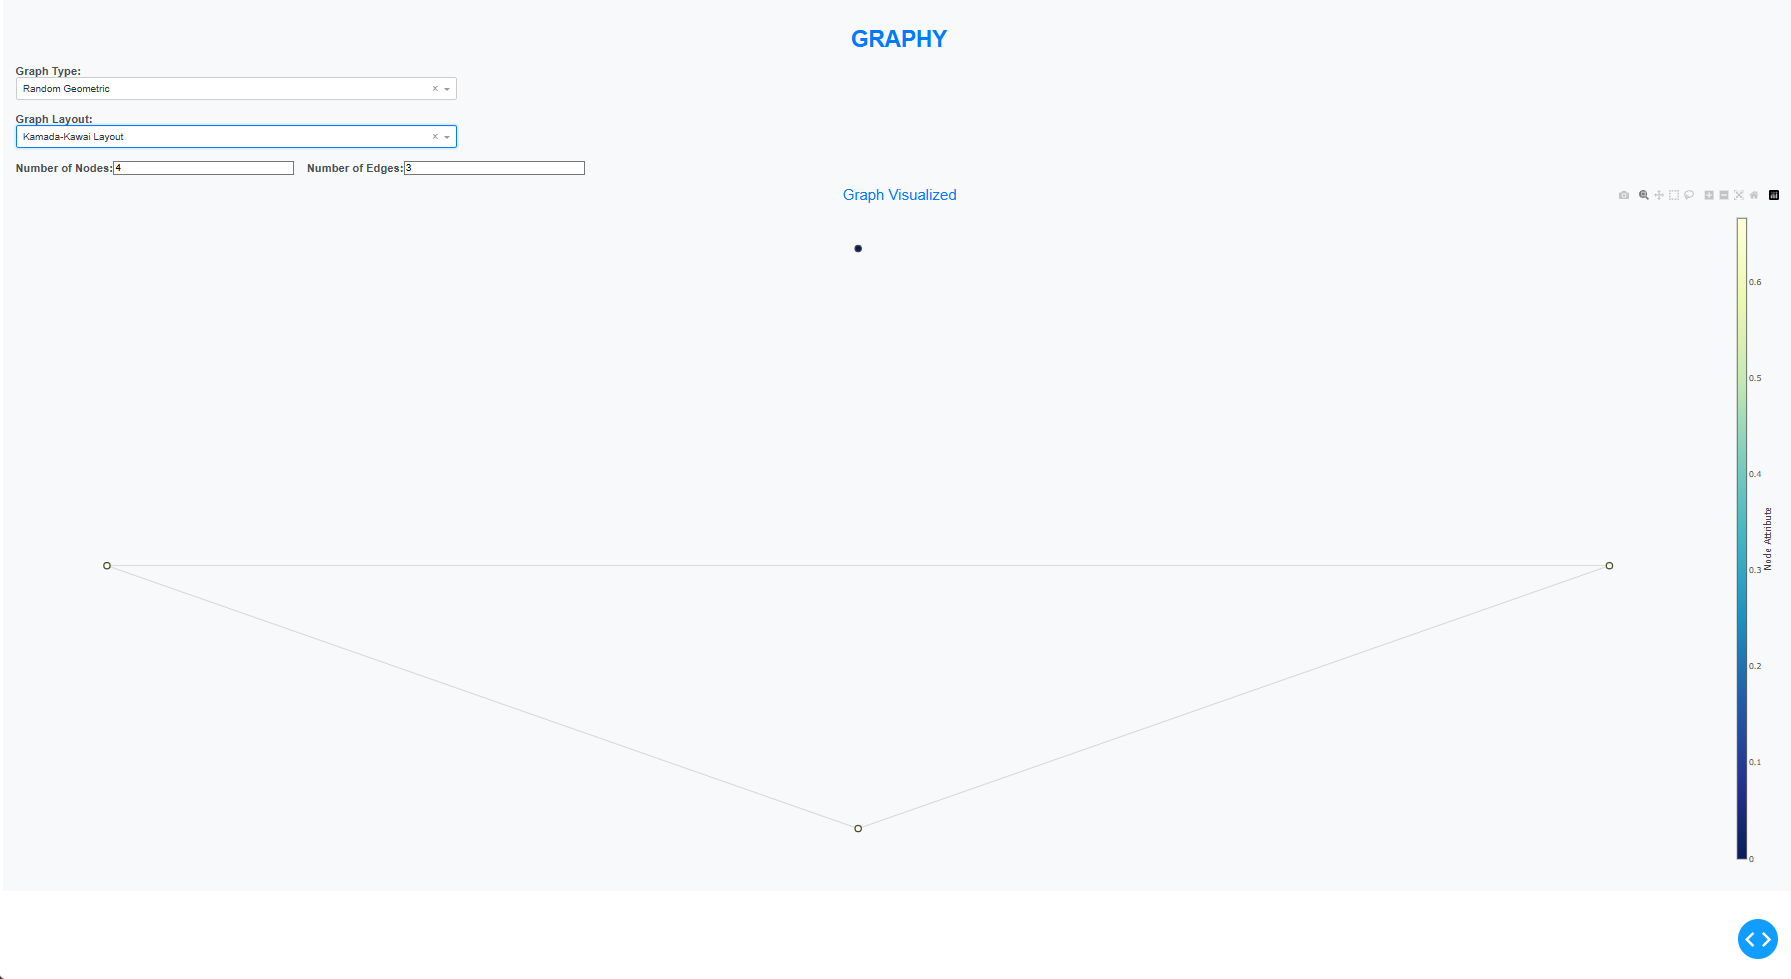
A Random Geometric Graph:
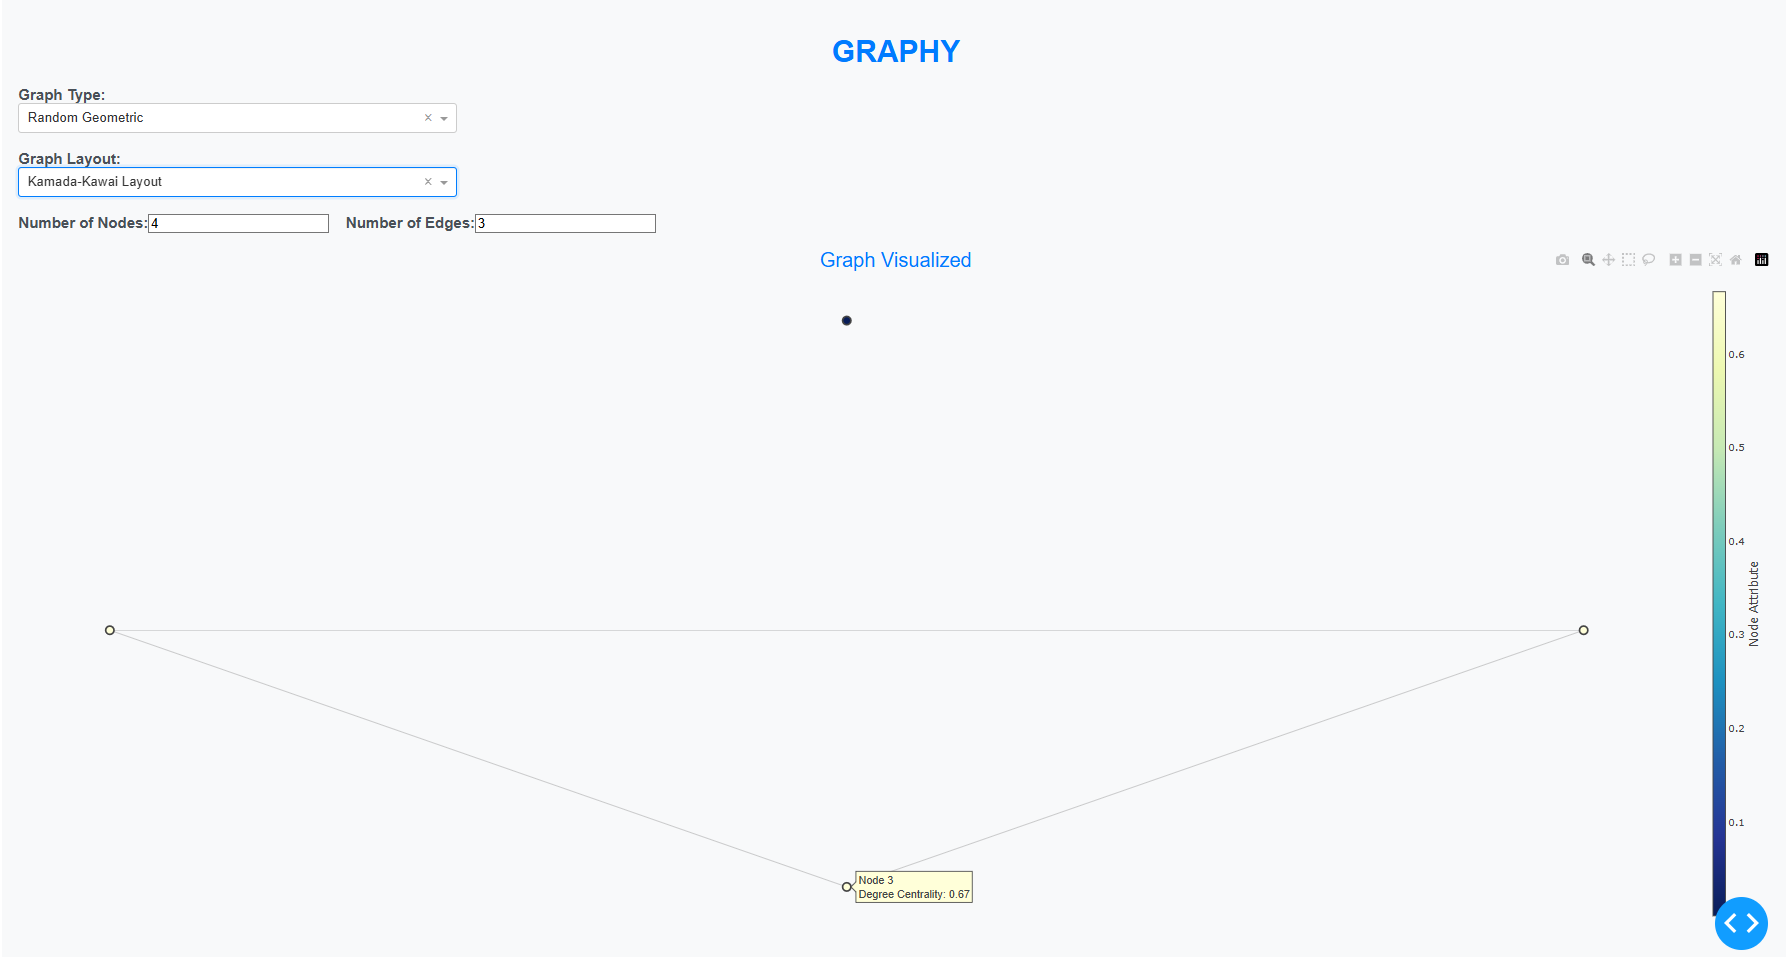
Hovering Over a Node shows its Degree Cardinality:
Here is a demonstration of the project web page in action:
Function Modifications on “generate_random_graph”
Erdős-Rényi Graph (erdos_renyi):
Parameters:
num_nodes: int – Number of nodes in the graph.
num_edges: float – Probability for edge creation. In NetworkX, this parameter represents the probability of an edge between any pair of nodes.
Modification:
The function uses nx.erdos_renyi_graph(num_nodes, num_edges) where num_edges serves as the probability for edge creation.
Barabási-Albert Graph (barabasi_albert):
Parameters:
num_nodes: int – Number of nodes in the graph.
num_edges: int – Number of edges to attach from a new node to existing nodes (m parameter).
Modification:
Checks if num_edges is a float, converting it to int if necessary before creating the graph with nx.barabasi_albert_graph(num_nodes, num_edges).
Watts-Strogatz Graph (watts_strogatz):
Parameters:
num_nodes: int – Number of nodes in the graph.
num_edges: int – Each node is joined with its k nearest neighbors in a ring topology (k parameter).
p: float – Probability of rewiring each edge (default set to 0.3).
Modification:
Converts num_edges to int if it’s a float before creating the graph with nx.watts_strogatz_graph(num_nodes, num_edges, p=0.3).
Random Geometric Graph (random_geometric):
Parameters:
num_nodes: int or iterable – Number of nodes or iterable of nodes.
radius: float – Distance threshold value (default set to 0.3).
Modification:
Creates the graph using nx.random_geometric_graph(num_nodes, radius=0.3), where radius determines the distance threshold for connecting nodes.
Connected Caveman Graph (connected_caveman):
Parameters:
num_nodes: int – Number of nodes in the graph.
num_edges: int – Number of edges per clique (l * (k-1) where l is the number of cliques and k is the size of cliques).
Modification:
Adjusts num_edges to an integer if it’s a float, then calculates the number of edges per clique (num_edges // num_nodes) before creating the graph with nx.connected_caveman_graph(num_nodes, num_edges // num_nodes).
Users can manually access additional graph definitions in NetworkX by exploring the official documentation or specific graph types that require parameters not covered in this function. Graph Generators Networkx
Contributing
Contributions are welcome! If you have suggestions, feature requests, or bug reports, please open an issue or submit a pull request.
Please note that responses may be delayed as I am not always actively monitoring this repository.
Future Goals:
Improving the UI/UX to make it more fluid.
Add more Graph types and Graph layout, will need to have a deeper understanding of graph systems.
Provide an example use cases ie., case studies.
Allow for custom use input through files like GML,CSV,LEDA and others which would allow for custom graphs to be visualised.
Proper Error Handling.
License
This project is licensed under the MIT License – see the LICENSE file for details.
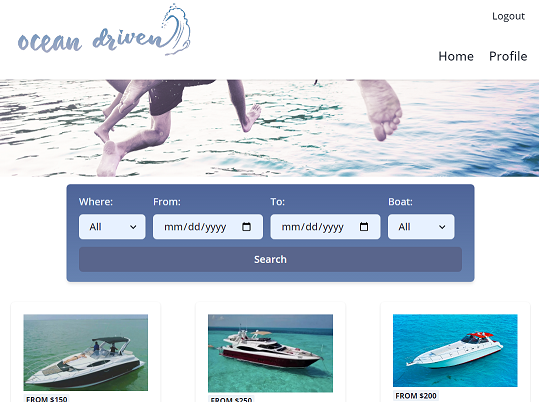
Welcome to Ocean Driven, a web application that allows users to book boats listed by other users. The goal for this project was to create a full MERN stack PWA with a major focus on user interaction and convenience. This was accomplished with the use of MongoDB for our database storage and React for our client-side rendering. This application also incorporates ChakraUI to create a visually appealing UI.
To use this application, click the provided link in the Installation section of the README. The page opens up to the ‘Home’ screen, where you will see a list of boats that have been added by other users. At the top of the page, you will see a search feature with fields for location, time range, and boat type so you can easily search for the perfect boat to book. Click on the ‘Login’ link in the top right corner to log in to an existing user, or the ‘Signup’ link to create a new account. Once logged in, click on the ‘Profile’ link to view your profile. Here you will see your info, current bookings, and if you are a boat owner, a list of boats you’ve added to the website. You may also add a new boat from the profile page by clicking the ‘Add Boat’ button. Travel back to the home page by clicking the ‘Home” link in the top right. Click on a boat card to view more details and schedule a booking. To book the boat, simply choose a beginning and end date for your booking and submit by clicking the book button. You may also check the availability for the boat by clicking the ‘Check Availability’ button. If you would like to leave a review, you may do so by clicking the ‘Write Review’ located below the boat’s features. Clicking the install button in the browser url bar will install the app to the device.
Permission is hereby granted, free of charge, to any person obtaining a copy
of this software and associated documentation files (the “Software”), to deal
in the Software without restriction, including without limitation the rights
to use, copy, modify, merge, publish, distribute, sublicense, and/or sell
copies of the Software, and to permit persons to whom the Software is
furnished to do so, subject to the following conditions:
A springboot secure web app with jsp support.
Three roles are defined; USER, ADMIN, and SUPER. All roles
can access pages /home, /login, and /about. Only USER
can access /user and ADMIN only /admin whereas SUPER can
navigate to either and have its own /super. Each role
has an action USER=VIEW ONLY, ADMIN=READ/WRITE, SUPER=CREATE.
All password are DES encrypted and encoded with argon2.
Presents a register form to create an inMemoryUser.
Once the user is created it is given the USER role
by default and auto logged in.
Presents a reset form to reset passwords on any user,
by default the user is reassigned USER role and auto
logged in. Only restriction on passwords are they match;
all validation is done client side.
Uses the rememberMe cookie for a 2 min window
this as well as other setting can be found in config/Security.scala. One way to test is the following:
Set rememberMe checkbox
login
set a bookmark to the secured page
open a new window
use the bookmark
rememberMe cookie does not redirect it only authenticates.
A Multimedia application where the user can run Videos, Images & Audio
XPlayer is a work-in-progress. This is a simple Media player application where the user sees his/her videos, images and audio.
It is still in its early stages of development; It is under heavy development.
6. Always take a pull from the upstream repository to your master branch to keep it at par with the main project(updated repository).
git pull upstream master
7. Create a new branch.
git checkout -b <your_branch_name>
8. Add your changes to the Project.
9. Track your changes ✔️ .
git add .
10. Commit your changes .
git commit -m "Relevant message"
11. Push the committed changes in your feature branch to your remote repo.
git push -u origin <your_branch_name>
12. To create a pull request, click on compare and pull requests. Please ensure you compare your feature branch to the desired branch of the repo you are supposed to make a PR to.
13. Add appropriate title and description to your pull request explaining your changes and efforts done.
Write clear meaningful git commit messages (Do read this).
Make sure your PR’s description contains GitHub’s special keyword references that automatically close the related issue when the PR is merged. (Check this for more info)
When you make very minor changes to a PR of yours (like for example fixing a text in button, minor changes requested by reviewers) make sure you squash your commits afterward so that you don’t have an absurd number of commits for a very small fix. (Learn how to squash at here)
When you’re submitting a PR for a UI-related issue, it would be really awesome if you add a screenshot of your change or a link to a deployment where it can be tested out along with your PR. It makes it very easy for the reviewers and you’ll also get reviews quicker.
CouchBackup is a command-line utility that allows a CouchDB database to be backed-up to a text file.
It comes with a companion command-line utility that can restore the backed up data.
** N.B. couchbackup does not do CouchDB replication as such, it simply streams through a database’s _changes feed, and uses POST /db/_bulk_get to fetch the documents, storing the documents it finds on disk. **
Installation
To install use npm:
npm install -g couchbackup
Usage
Either environment variables or command-line options can be used to specify the URL of the CouchDB or Cloudant instance, and the database to work with.
The URL
To define the URL of the CouchDB instance set the COUCH_URL environment variable:
A backup file is a text file where each line contains a JSON encoded array of up to 500 objects e.g.
[{"a":1},{"a":2}...]
[{"a":501},{"a":502}...]
What’s in a log file?
A log file contains a line:
for every batch of document ids that need to be fetched e.g. :t batch56 [{"id":"a"},{"id":"b"}]
for every batch that has been fetched and stored e.g. :d batch56
to indicate that the changes feed was fully consumed e.g. :changes_complete
What is shallow mode?
When you run couchbackup with --mode shallow a simpler backup is performed, only backing up the winning revisions
of the database. No revision tokens are saved and any conflicting revisions are ignored. This is a faster, but less
complete backup. Shallow backups cannot be resumed because they do not produce a log file.
Why use CouchBackup?
The easiest way to backup a CouchDB database is to copy the “.couch” file. This is fine on a single-node instance, but when running multi-node
Cloudant or using CouchDB 2.0 or greater, the “.couch” file only contains a single shard of data. This utility allows simple backups of CouchDB
or Cloudant database using the HTTP API.
This tool can be used to script the backup of your databases. Move the backup and log files to cheap Object Storage so that you have multiple copies of your precious data.
COUCH_DATABASE – the name of the database to act upon e.g. mydb (default ‘test’)
COUCH_PARALLELISM – the number of HTTP requests to perform in parallel when restoring a backup e.g. 10 (Default 5)
COUCH_BUFFER_SIZE – the number of documents fetched and restored at once e.g. 100 (default 500)
COUCH_LOG – the file to store logging information during backup
COUCH_RESUME – if ‘true’, resumes a previous backup from its last known position
COUCH_OUTPUT – the file name to store the backup data (defaults to stdout)
COUCH_MODE – if ‘shallow’, only a superfical backup is done, ignoring conflicts and revision tokens. Defaults to ‘full’ – a full backup.
Command-line paramters
–url – same as COUCH_URL environment variable
–db – same as COUCH_DATABASE
–parallelism – same as COUCH_PARALLELISM
–buffer – same as COUCH_BUFFER_SIZE
–log – same as COUCH_LOG
–resume – same as COUCH_RESUME
–output – same as COUCH_OUTPUT
–mode – same as COUCH_MODE
Using programmatically
You can now use couchbackup programatically. First install the couchbackup into your project
with npm install --save couchbackup. Then you can import the library into your code:
var couchbackup = require('couchbackup');
Define some options, using an object that contains attributes with the same names as the environment
variables used to configure the command-line utilities:
var opts = {
  "COUCH_URL": "http://127.0.0.1:5984",
  "COUCH_DATABASE": "mydb",
}
This project adds typings for the web’s aria attributes. It also adds a polyfill for the reflection of those attributes as DOM Element properties.
It uses microsoft/vscode-custom-data (the same source of information used for VS Code’s HTML and CSS autocomplete suggestions and hover documentation).
How to Use
Motivation
Most HTML attributes are reflected as object properties in the JS DOM, but reflection for some important properties is not yet implemented in some major browsers- particularly aria attributes, which at the time of this writing, have not been implemented in Firefox yet. Some front end frameworks provide this functionality, but not all projects use frameworks.
Once that happens, I hope that either one of VS Code’s Custom Data or MDN’s Browser Compat Data can be integrated into TypeScript’s lib.dom generator, but kind of doubt that that will happen. Seeing that the IDL definitions (which are what the TS lib generator uses) in the aria spec just specify DOMString, this package will probably still be useful after aria reflection lands in Firefox since it has documentation about what each attribute is for, and what values it can take on.
By clicking on the Add-on icon or using the shortcut keys you can have a preview of the page you are accessing before printing, thus providing a paper economy in addition to avoiding repeated impressions, which certainly benefit the nature.
Requirements
Firefox 58.0 or later
Features
Click on the button in toolbar to print preview
Enable or disable the context menu to print preview
Use shortcuts to open the print preview
You can edit the shortcuts in about:addons (Firefox version 66.0 or later)
Translated in 4 languages English, French, Português (do Brasil) and Spanish
Shortcuts (Default)
Mac shortcut keys: Command + Shift + U
Windows shortcut keys: Ctrl + Shift + U
Linux shortcut keys: Ctrl + Shift + U
Change shortcuts
In your address bar type “about:addons”
Click the gear above the installed Add-ons
Click in “Manage Extension Shortcuts”
How Contribute
Have a suggestion, doubt or encountered an error? Please open a new issue
Contributions are welcome, feel free to submit a pull 🙂
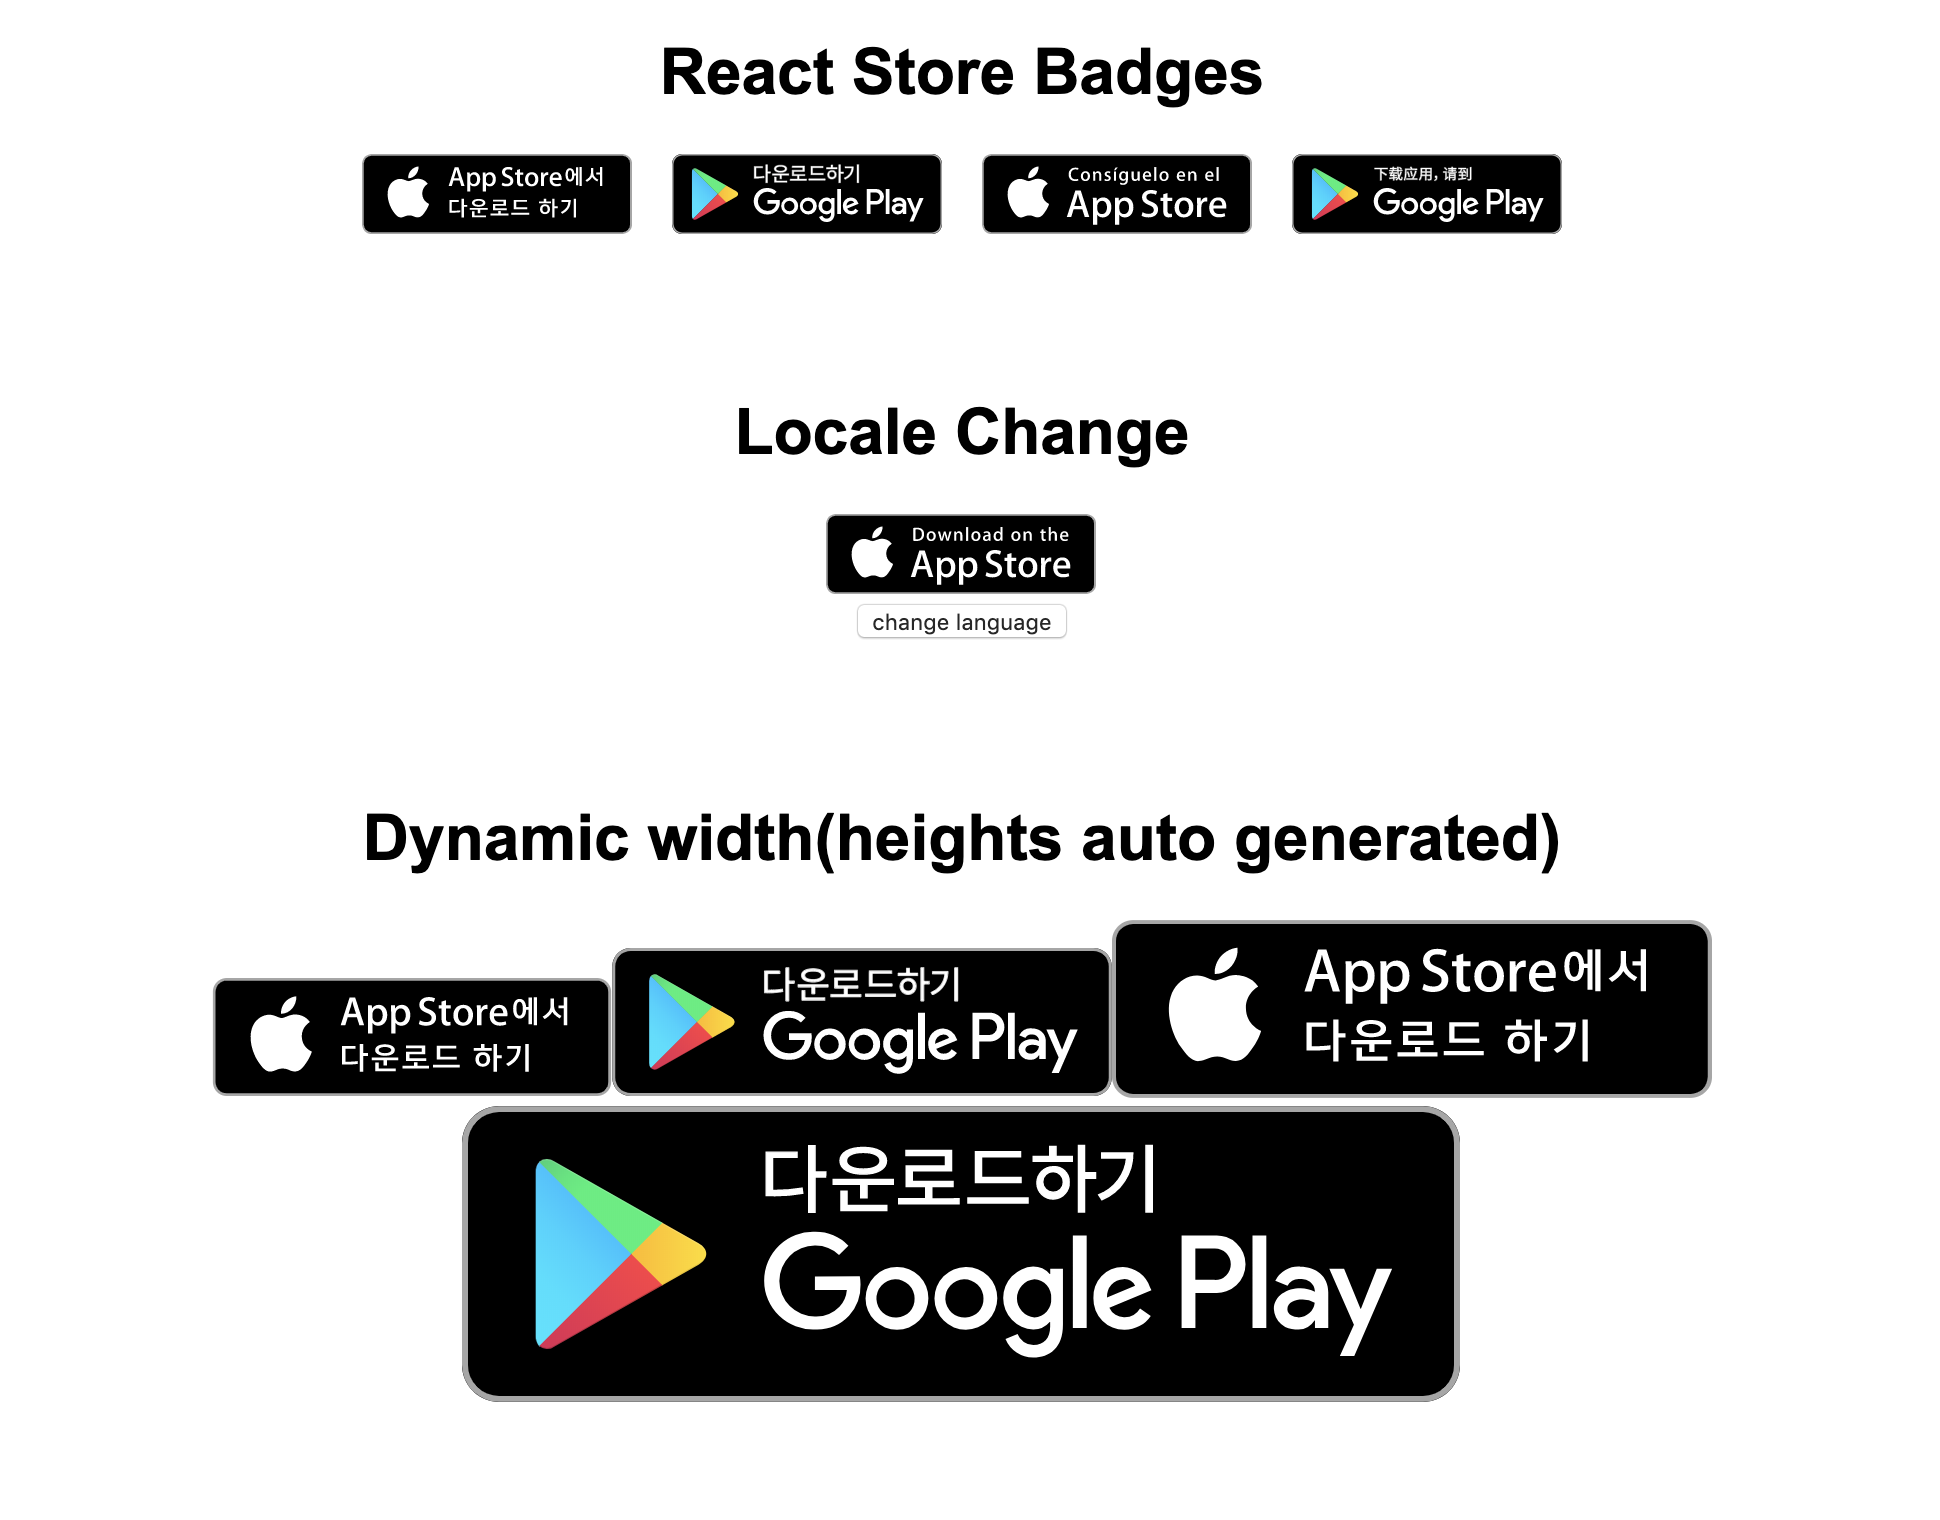
react-store-badges is a React.js component displaying badges for App Store and Google Play Store. react-store-badge serves locale(localization) setting for each country.
react-store-badge uses SVG files, (optimized by svgo) so no worries about image going wrong.
iOS uses full code of their locale. (ex. en-us) and google uses short code of their locale(ex. en). So if you want your badge in only one store, you can customize it anyway.
Badge Guidelines
please note that you have to follow the guidelines below
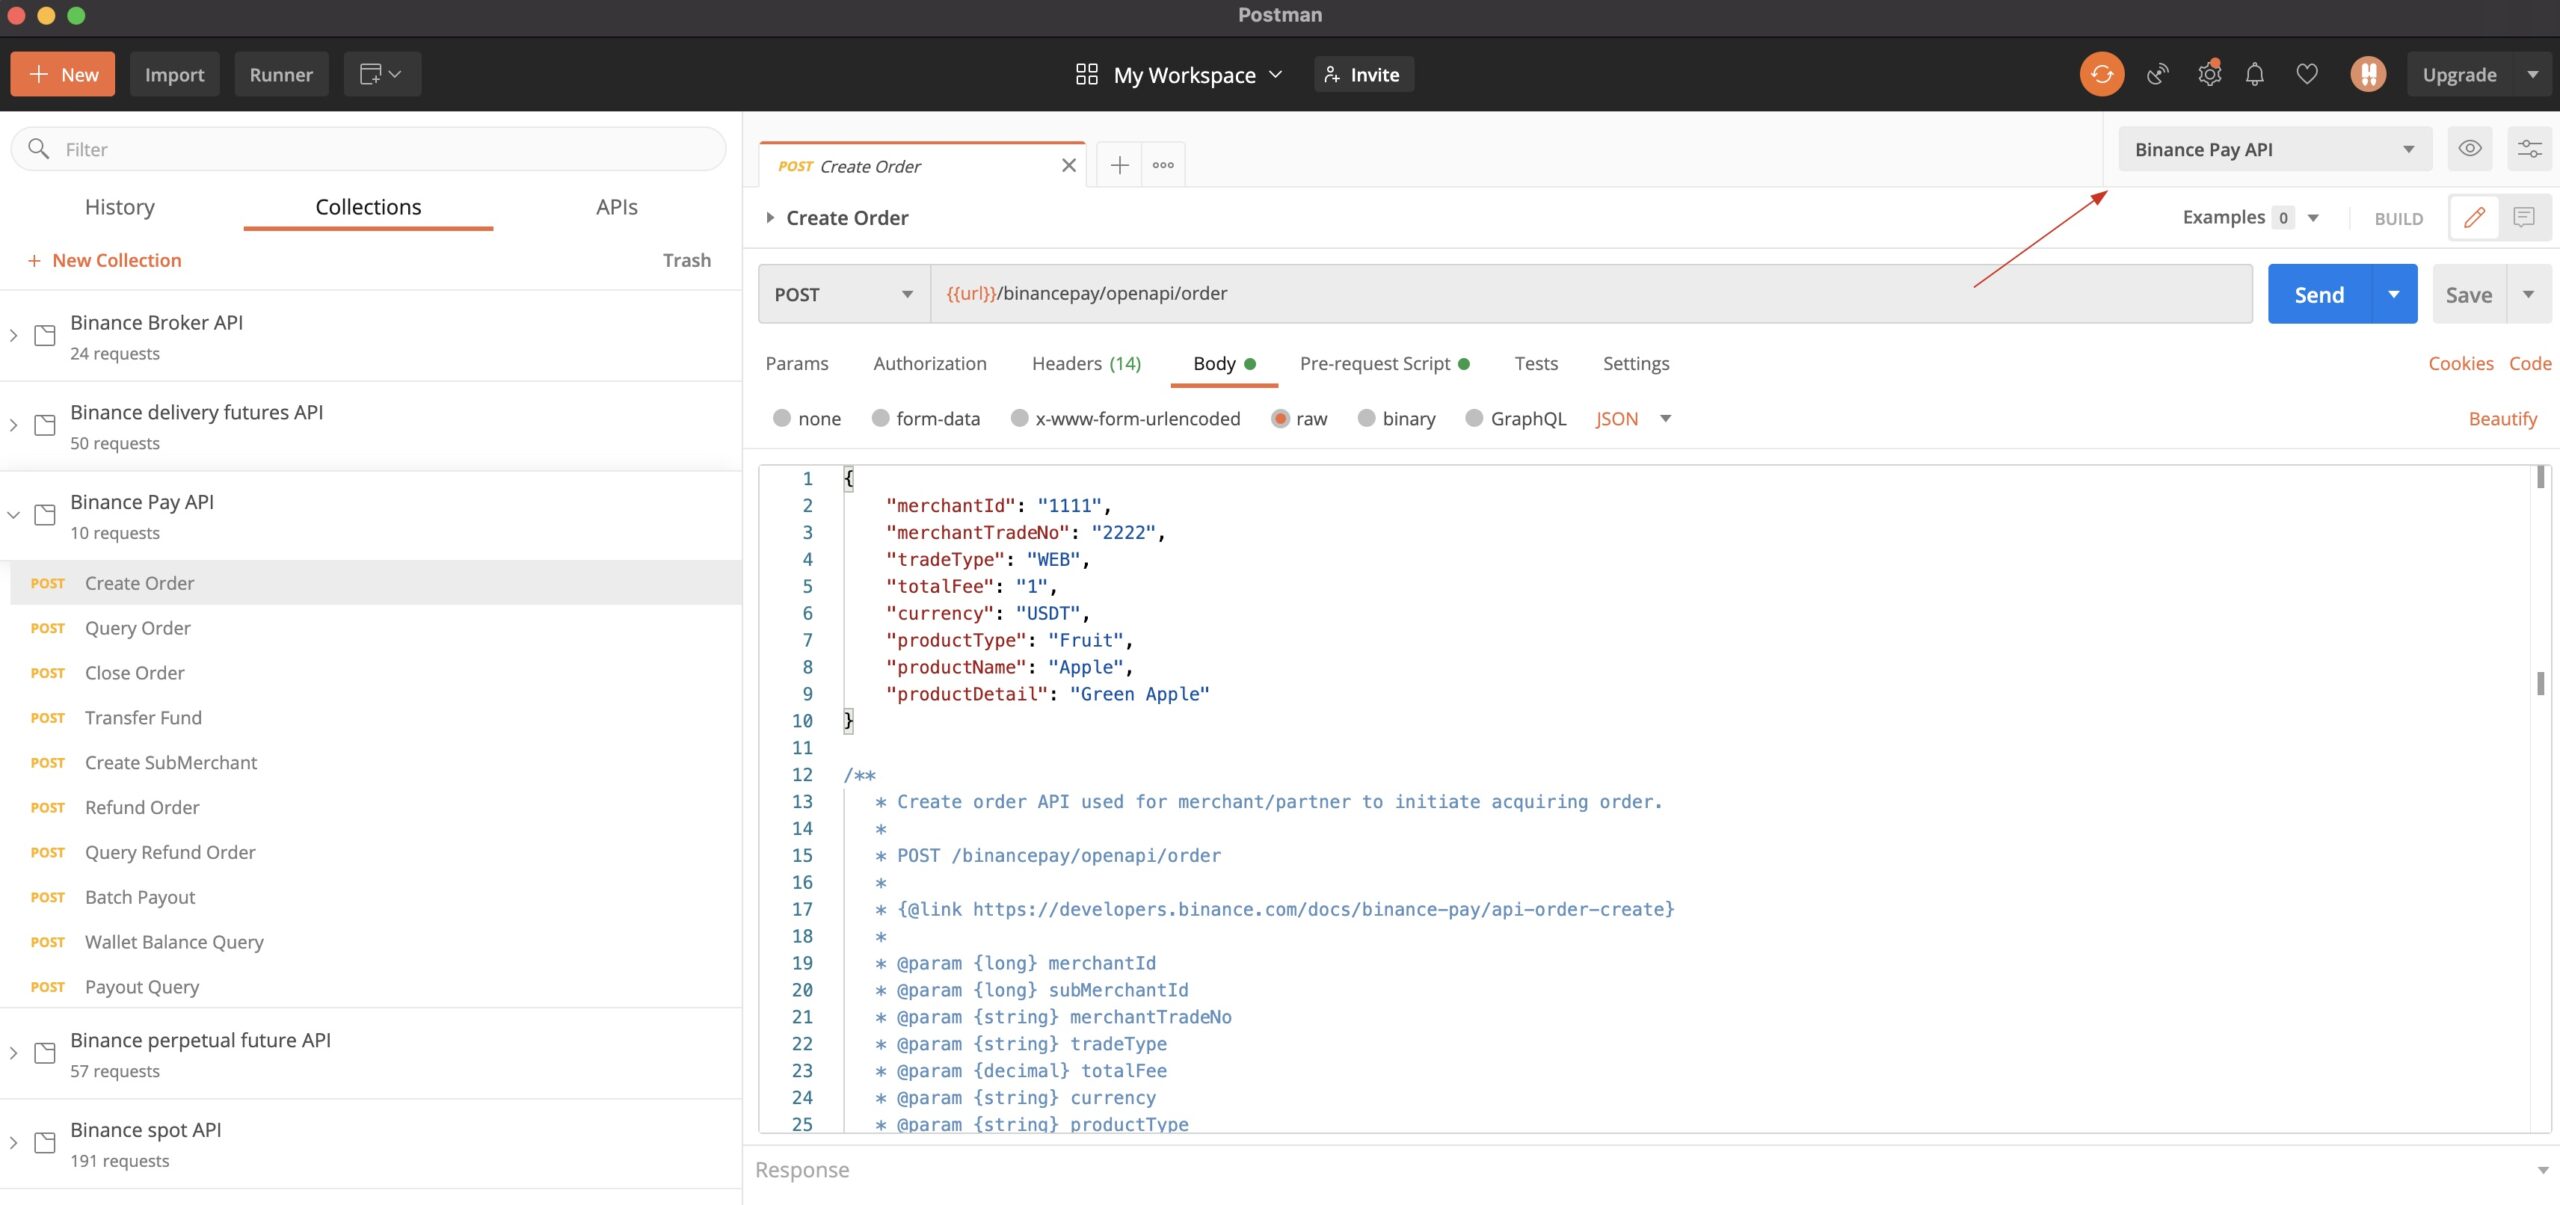
Binance Pay now offers Postman Collection and Environment (JSON files) for a quicker and easier usage of our RESTful APIs.
You only need to import and set up with your own API and secret keys to begin.
How to import and configure
Download the binance-pay-postman-collection repository.
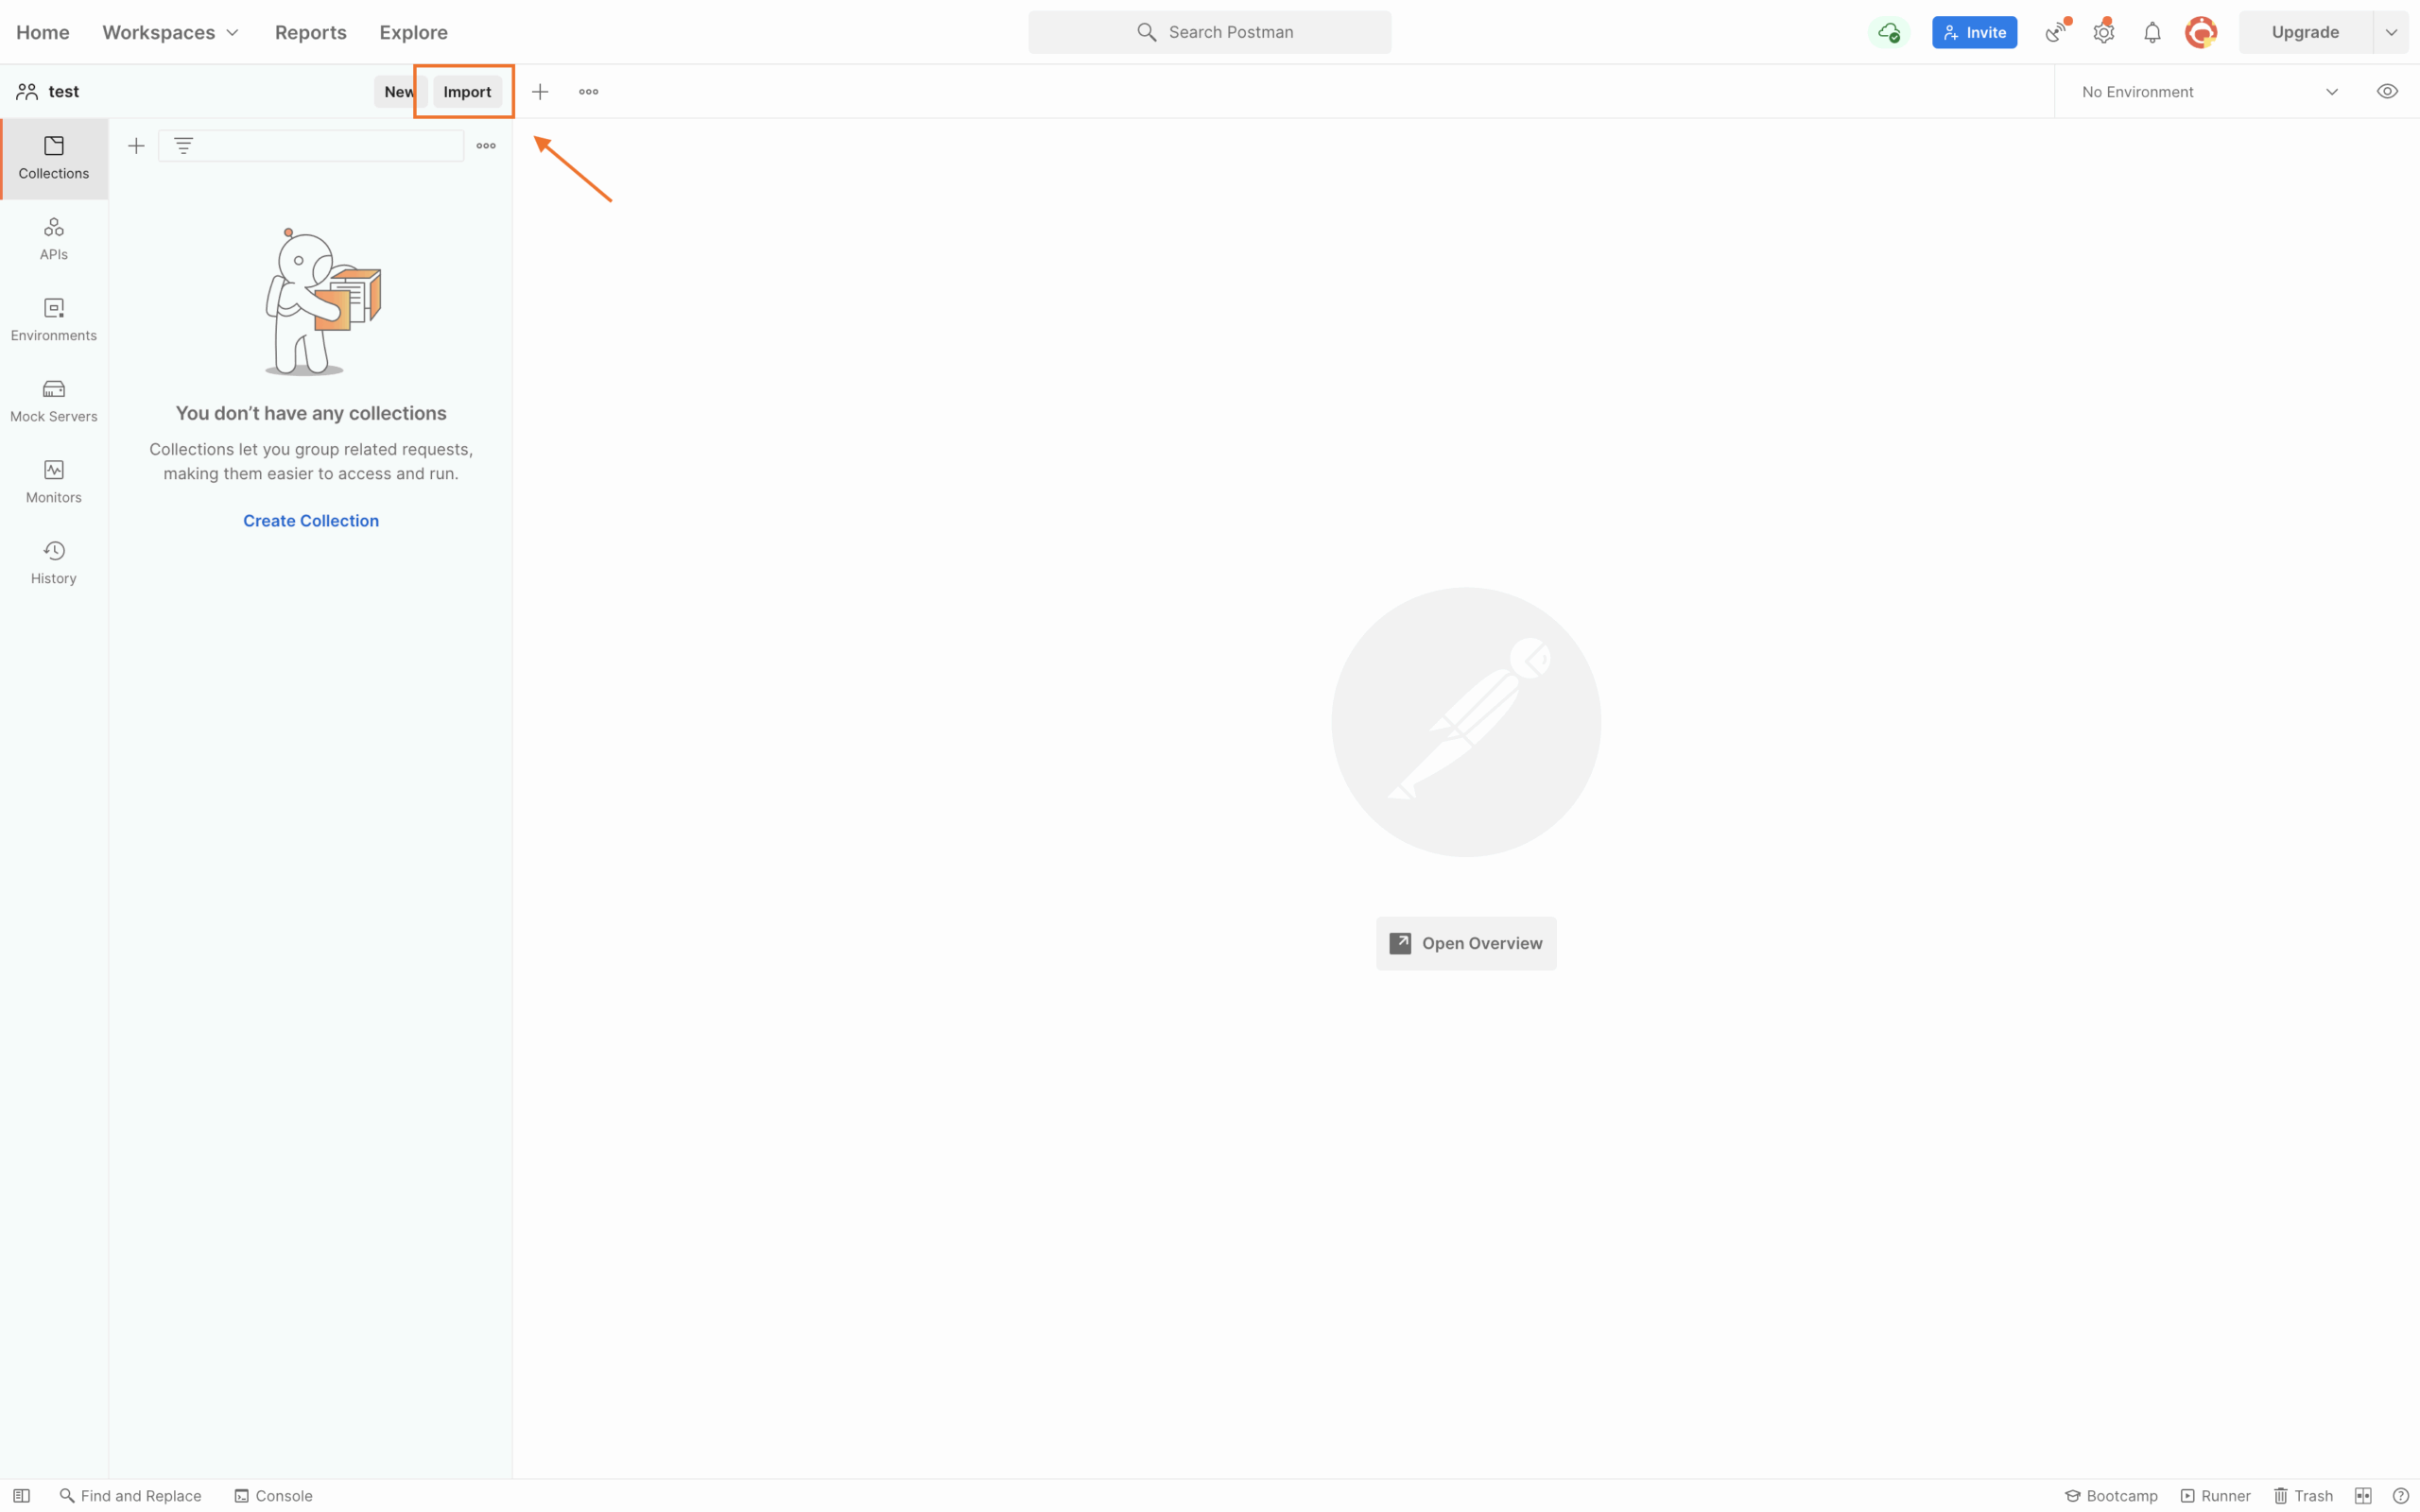
Click the Import button. On Postman for Mac, for example, the button is at the top left:
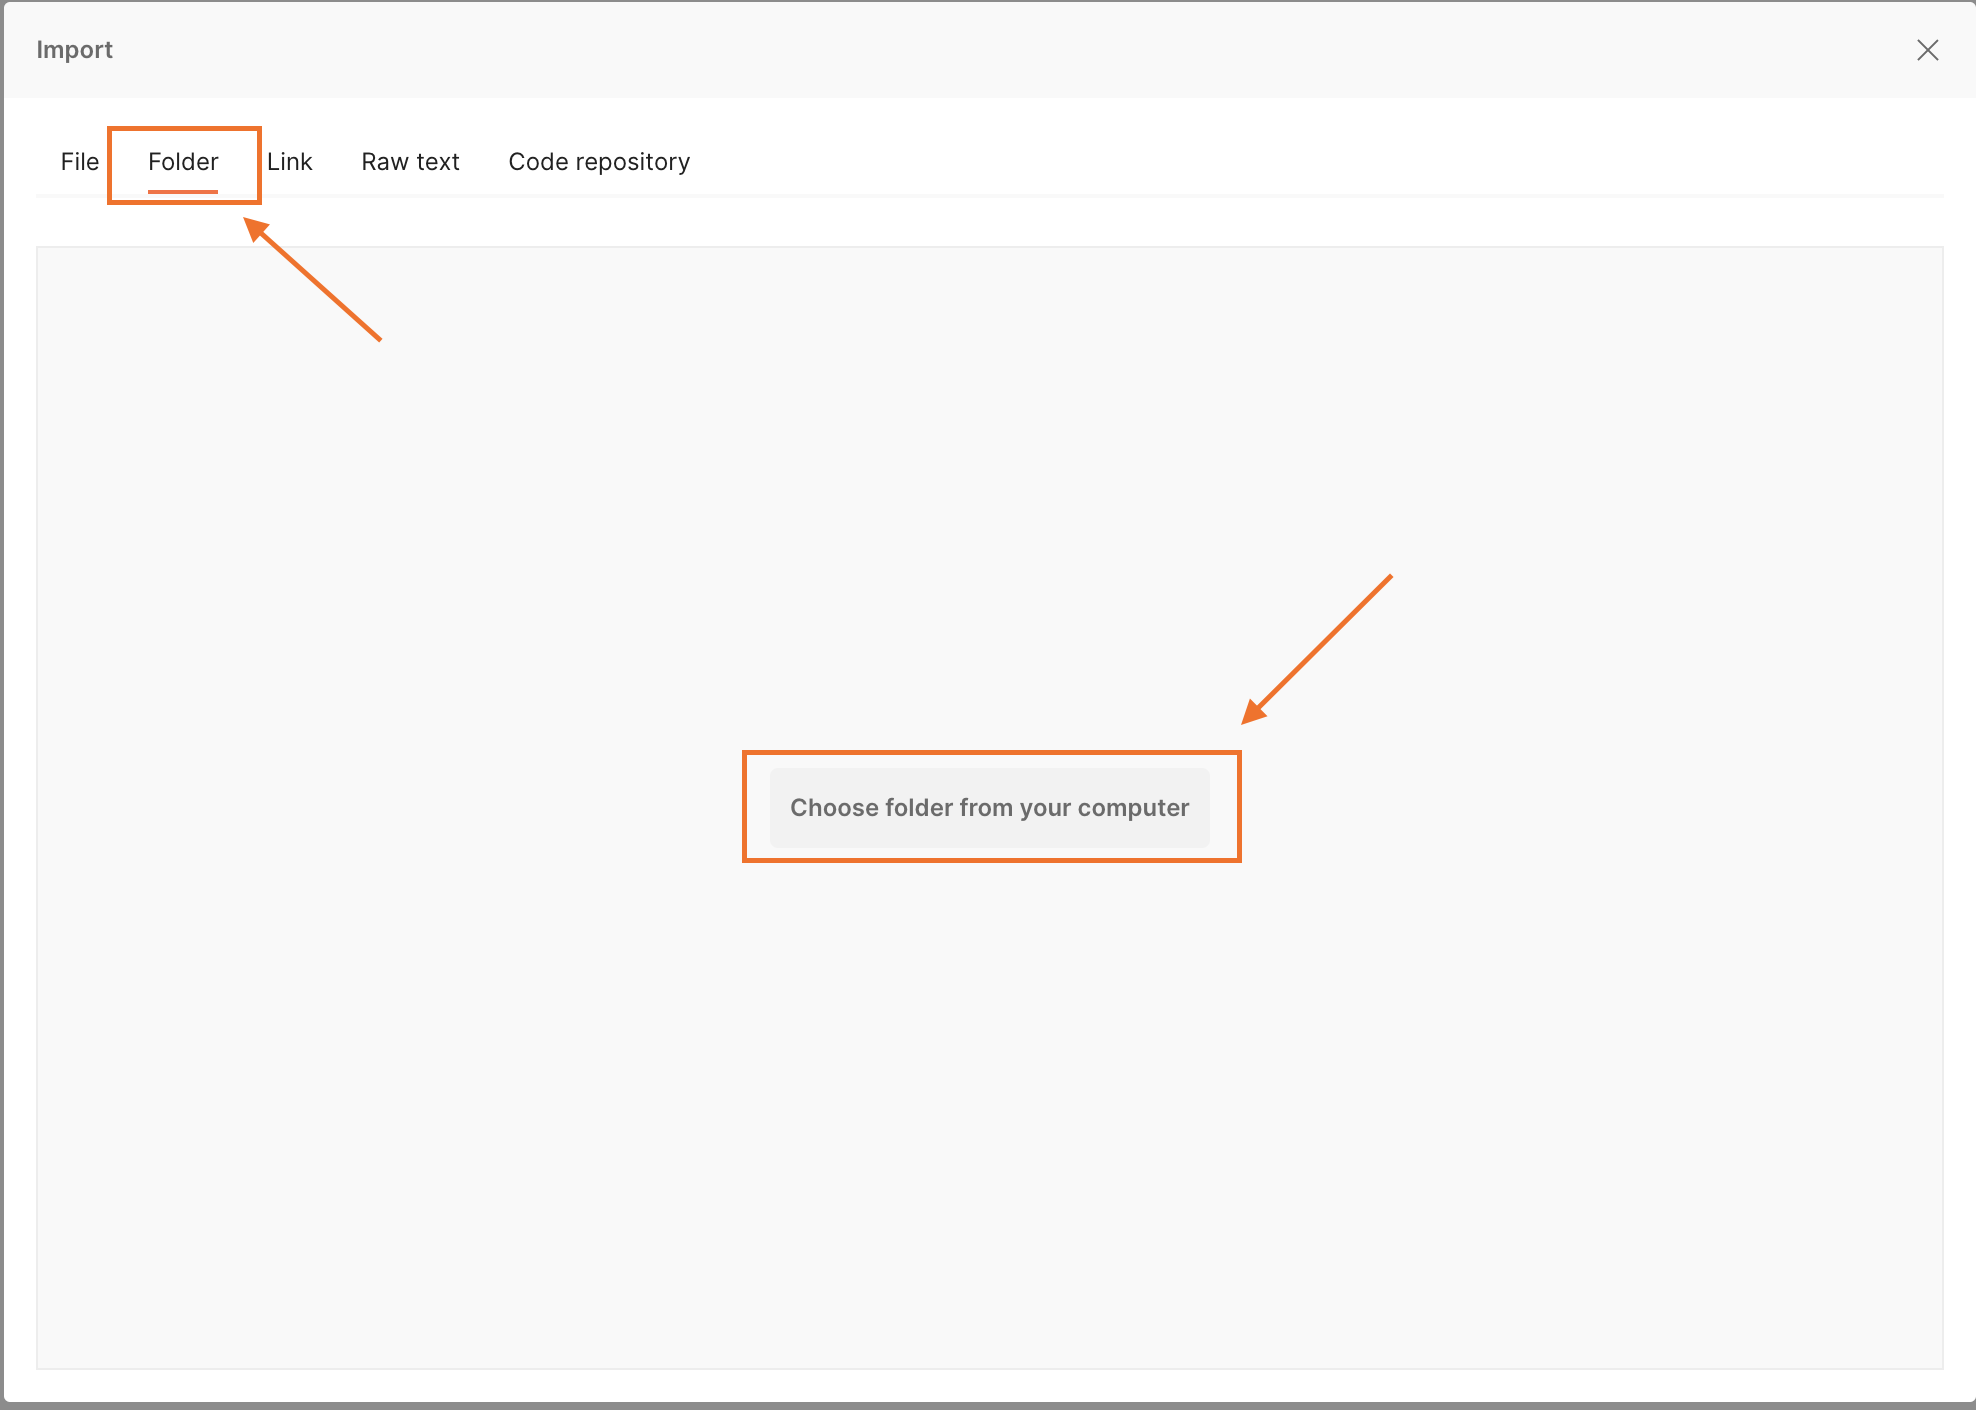
On the Import pop-up page, select the Folder tab. Click the Choose folder from your computer button and choose the root folder of the downloaded repository.
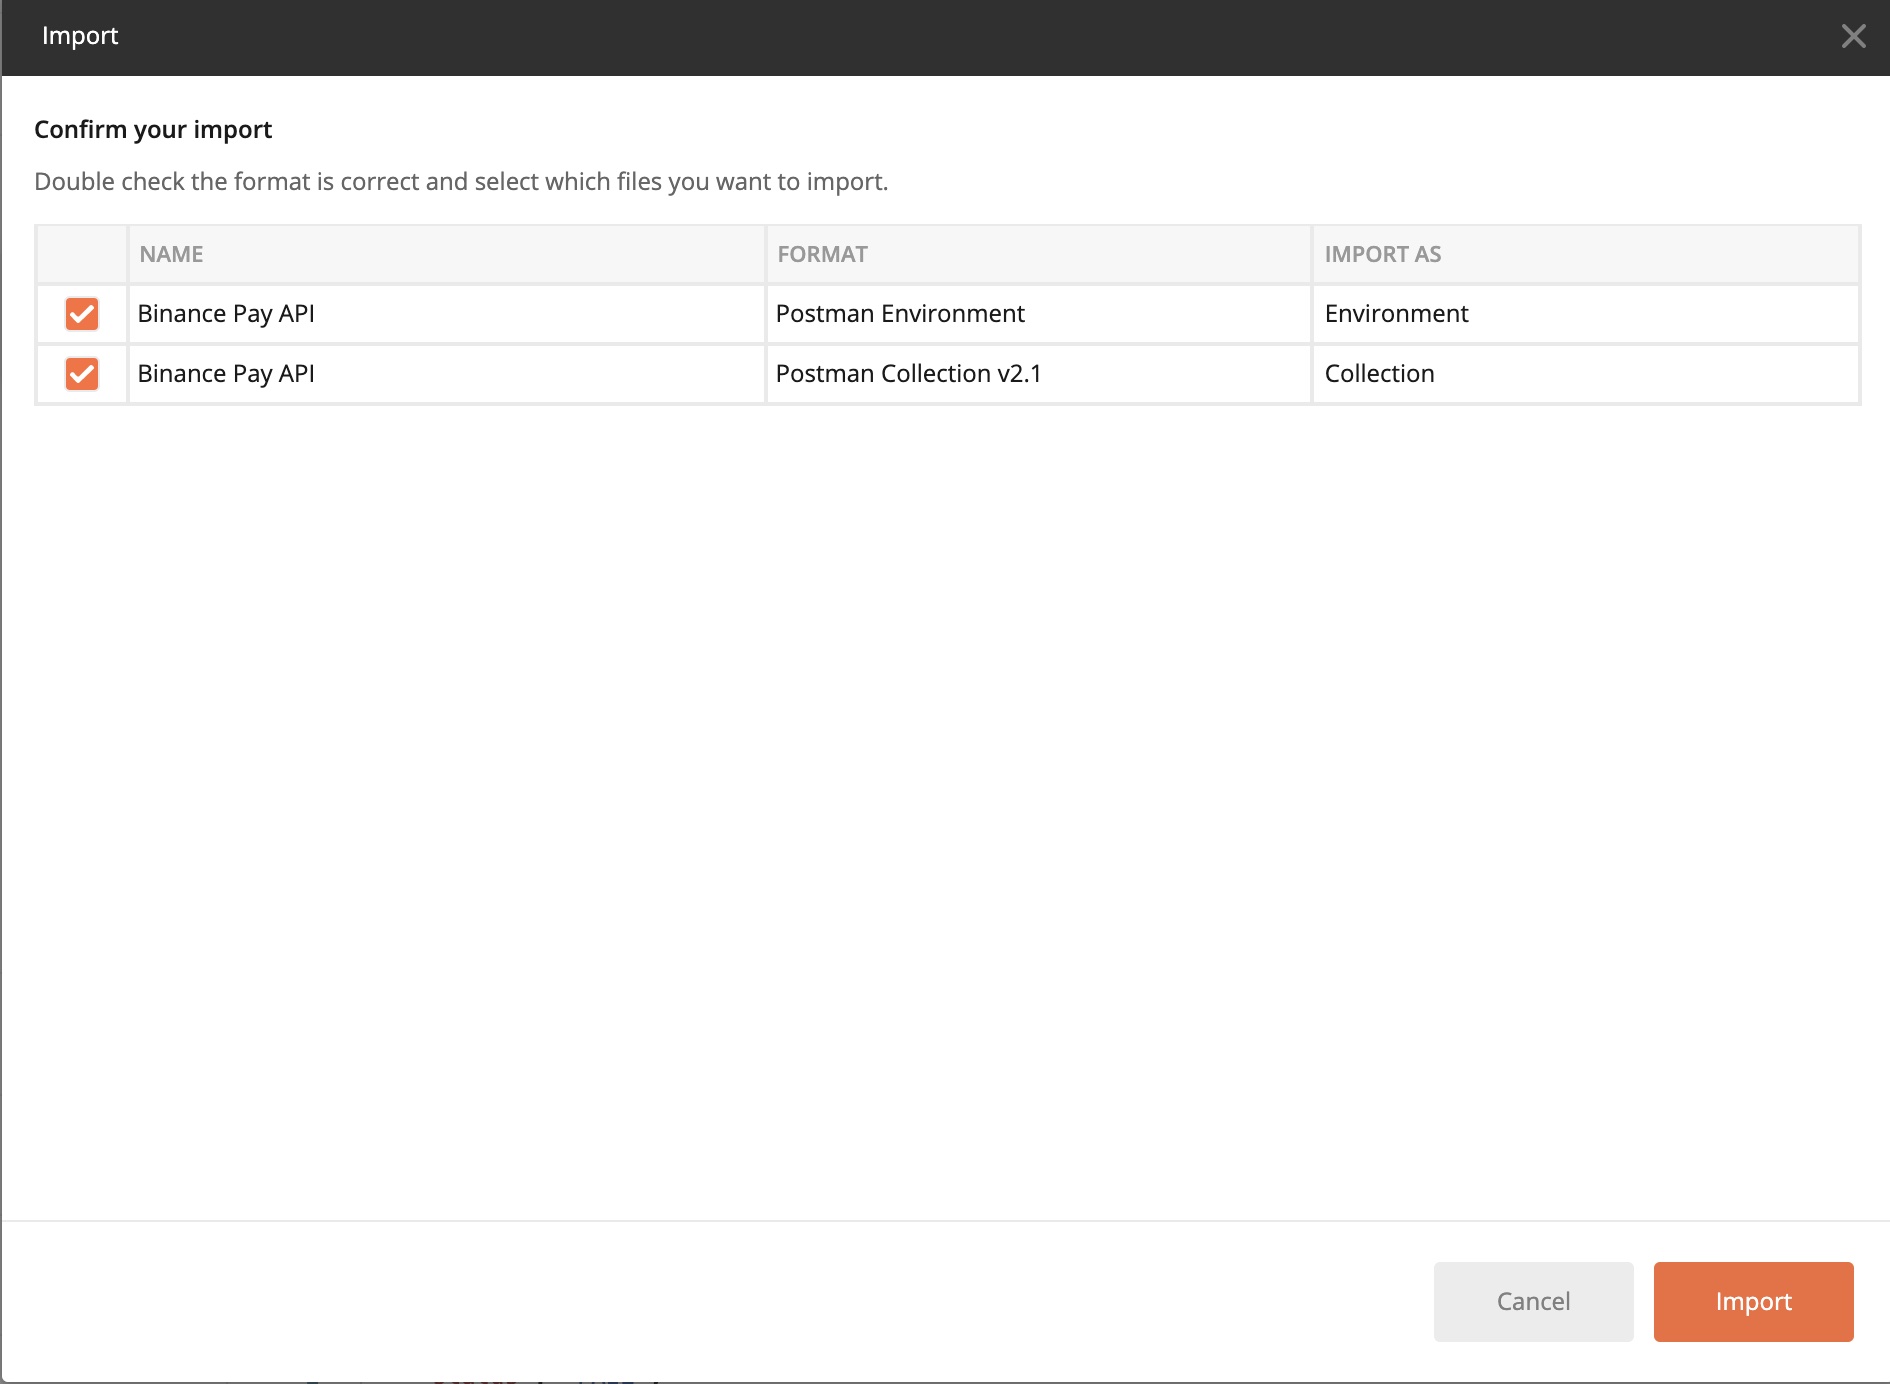
Select which collections and environments you would like to import and click the Import button.
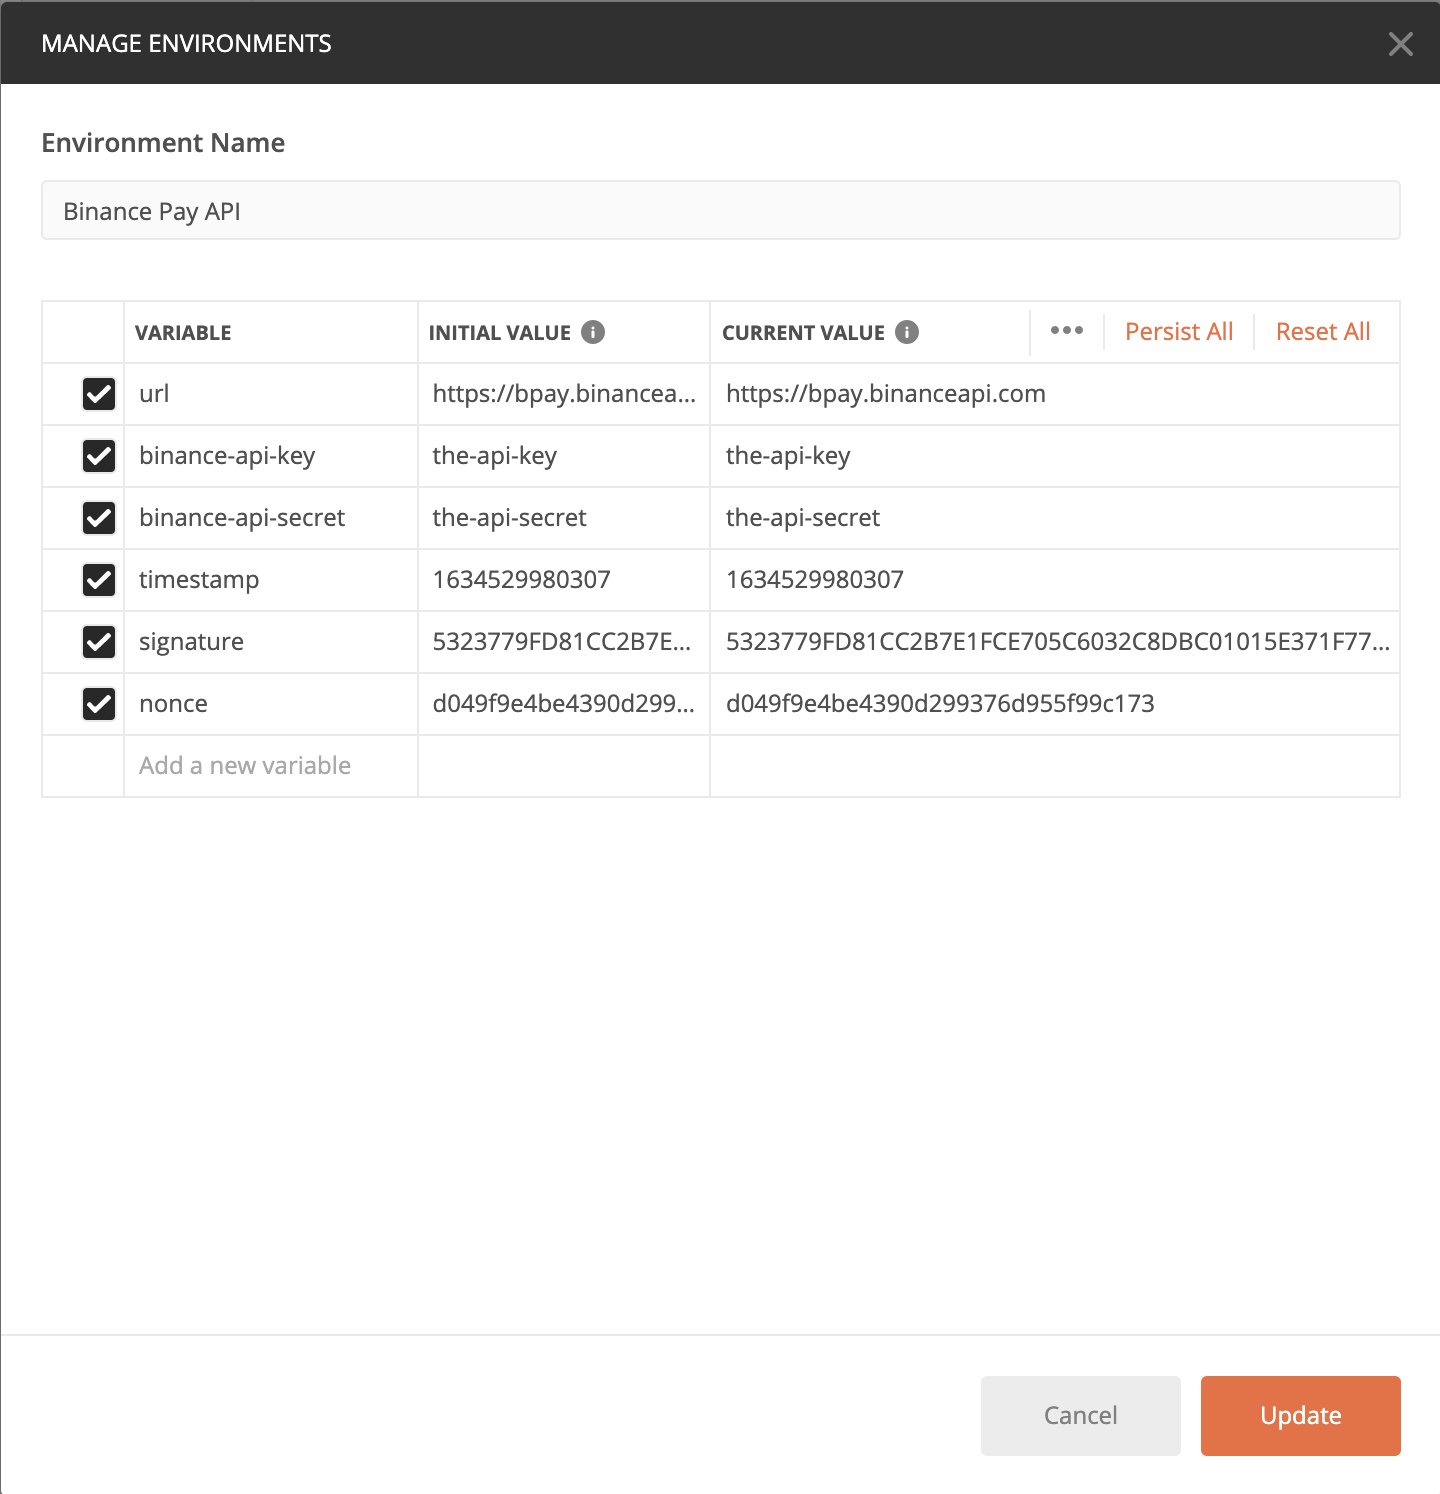
Select the Environments tab on the left, choose an environment, and set your Api Key and Secret Key by changing the Current Value column (see screenshot);
(The Timestamp, Signature, nonce fields can be left empty as they’ll be automatically filled by Postman when sending a request.)
Select your newly-added environment from the environment dropdown menu. On Mac, this is at top right, to the left of the eye icon.
Postman safety practices
The following practices are advised to secure your account’s safety:
Don’t use Collections obtained from an unknown source.
Review the environment JSON file before its usage.
Don’t use any code that you don’t understand.
Make sure that the withdrawal permission is not enabled for your API keys.
When you finish trying out the API, delete your API keys.
FAQ
Q: Why I can’t get any response?
You haven’t imported the environment file or you’ve imported it but haven’t selected it from the dropdown menu (mentioned in [[How to import and configure]])
Q: How can I debug a request or find the used URL?
Open the Postman’s console to find requests’ parameters and URL.
Debugging can be done by editing the Pre-request Script tab.
Q: Error Mandatory parameter 'xxxx' was not sent, was empty/null, or malformed.
Likely causes:
API key is not set.
API key is not correct.
BinancePay-Certificate-SN is not selected in your Postman Headers tab.
Q: Error Signature for this request is not valid.
Likely causes:
Secret key is not set.
Request was made with at least one empty parameter.
signature is not the last parameter in the parameters list.
Q: Error A mandatory parameter was not sent, was empty/null, or malformed.
Please refer to the API documentation to double check all the mandatory parameters.
My question isn’t here
If you don’t find your answer here, please consult https://dev.binance.vision/ for similar questions from the community or
open an issue here.


 https://github.com/NVlabs/FB-BEV